22 Classic Bathroom Ideas That Never Go Out of Style
Some bathrooms stop you in your tracks and nine times out of ten, they’re not following the latest trend. They’re classic. I’ve walked into hundreds of homes across the US as a designer, and the bathrooms that genuinely take your breath away are almost always the ones built around timeless principles rather than whatever was trending on Pinterest that season. The good news? You don’t need a massive budget or a full gut renovation to get there. These 22 classic bathroom ideas will show you exactly how to create a space that looks just as stunning ten years from now as it does today.
My Design Notes
A few years back, I was working with a client in Charlotte, NC a lovely woman who had just purchased a 1978 ranch style home. The primary bathroom was still rocking the original pink tile and a harvest gold vanity. She had an $8,000 budget and was convinced she needed to tear everything out. We didn’t touch a single wall. Instead, we painted the vanity Benjamin Moore White Dove, swapped the outdated gold hardware for brushed nickel pulls, hung a framed mirror from Restoration Hardware’s outlet section, and laid peel and stick black and white hex tile directly over the existing floor. The total spend came in just under $1,600. When she saw the finished bathroom, she cried happy tears, thankfully. That project cemented something I already believed: classic bathroom design isn’t about how much you spend. It’s about knowing which changes actually move the needle. Every idea in this article comes from that same philosophy real results, real spaces, real budgets.
Classic Bathroom Ideas : Worth Stealing From the Most Beautiful Homes in the USA
1. The Black and White Floor That Anchors Everything
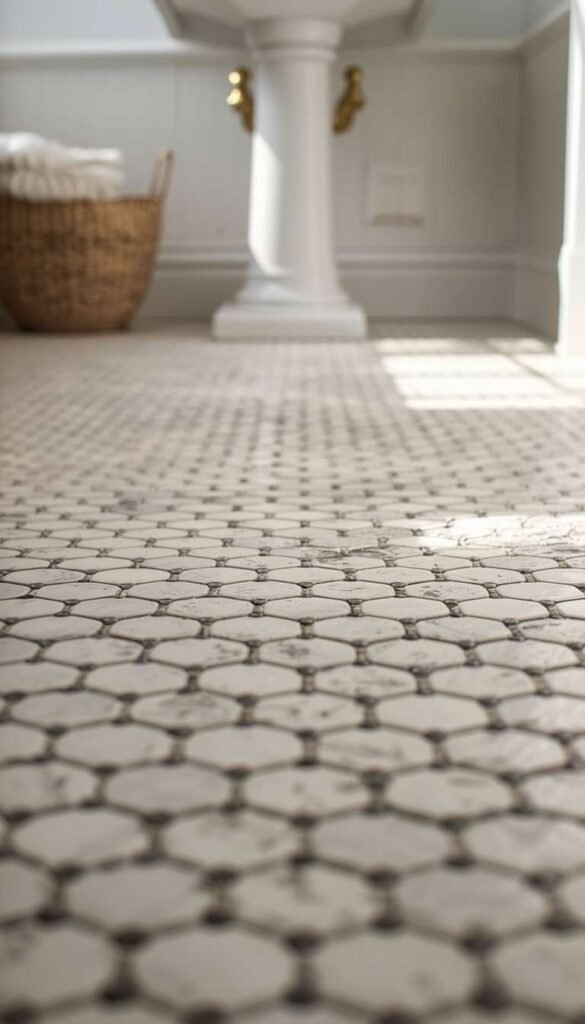
There is a reason this combination has survived every design era since the early 1900s. Black and white bathroom floors are the closest thing to a guaranteed win in classic bathroom design. I’ve specified this pairing in everything from a tiny powder room in a Brooklyn brownstone to a sprawling primary bath in a Dallas new build, and it has never once looked wrong.
The tile size matters more than most people realize. Small 2 inch hex tiles feel more vintage and intimate. Larger 4×4 squares read as cleaner and slightly more modern. My personal sweet spot for most US bathrooms is the 2-inch black and white hex it photographs beautifully and holds up visually even in a small space.
One thing to watch out for is grout color. White grout will show every bit of grime within six months. Go with a light gray grout instead it hides wear, still reads as clean, and doesn’t compete with the pattern.
2. Subway Tile Done in a Way That Actually Feels Fresh
Subway tile is everywhere, and yet somehow it never gets old. The secret is in how you lay it. Most builders default to the basic horizontal stack, which is fine but it’s also the most forgettable version of a genuinely great material. A quick trick I’ve learned over the years is to specify the layout before anything else gets ordered, because the same tile can look completely different depending on the pattern.
Here are the three layouts worth considering:
- Herringbone: The most visually dynamic. Works beautifully as a shower accent wall.
- Vertical stack: Adds height to low ceilinged bathrooms. Underused and underrated.
- Offset brick (traditional): The reliable classic. Never wrong, never exciting.
Gray grout over white subway tile is one of those small decisions that makes a bathroom look intentional rather than builder-grade. It costs nothing extra and makes a genuine difference.
3. The Clawfoot Tub Worth It or Just Pretty

Let me be straight with you here because most design blogs won’t be. Clawfoot tubs are stunning. They are also uncomfortable for anyone over 5’8″, difficult to clean around the base, and if you go cast iron heavy enough to require a structural assessment before installation in older homes. That said, I still recommend them regularly, because for the right client in the right space, nothing else comes close.
If you love the look but want something more practical, an acrylic freestanding tub with claw feet gives you 90% of the visual impact at roughly half the weight and cost. Cast iron runs $1,500 to $4,000+. A quality acrylic version can be found for $600 to $1,200. Both look gorgeous. Only one will make your back hurt when you try to scrub underneath it.
4. Marble the Beauty and the Burden
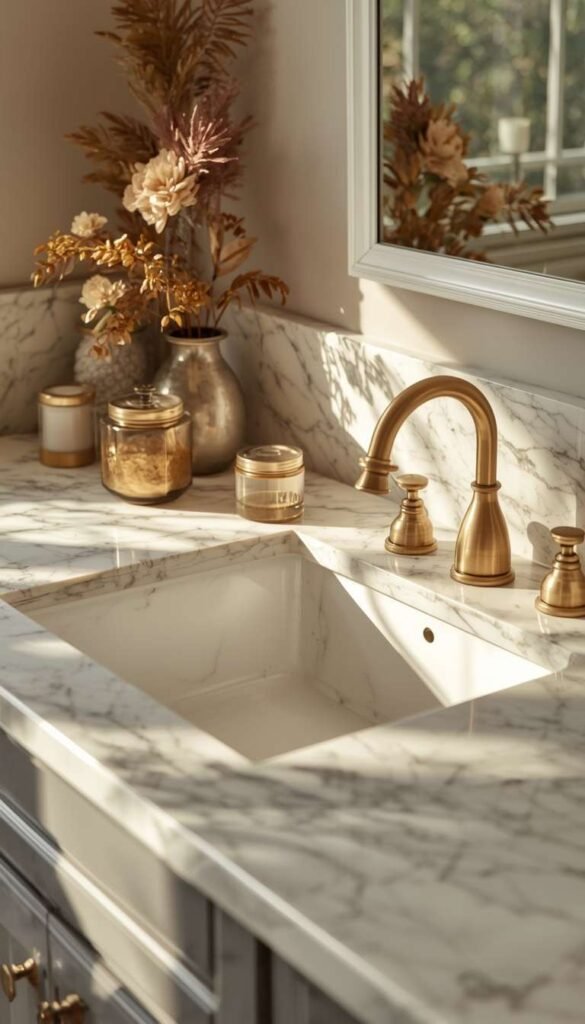
Marble is the gold standard of classic bathroom materials, and I will never stop specifying it for clients who are prepared for what it actually requires. Here is what the pretty magazine photos don’t show you marble is porous, it stains from acidic products like perfume and certain cleansers, and it needs to be sealed every six to twelve months to stay looking its best.
That said, when it’s cared for properly, nothing else in a bathroom commands the same level of elegance. White Carrara is the most popular and affordable entry point. Calacatta is more dramatic with bolder veining and a higher price tag. For clients who love the look but not the maintenance, I often suggest a high quality porcelain marble lookalike for the floors and reserve real marble for just the vanity top you get the authentic material where it counts most and save yourself the floor sealing headache entirely.
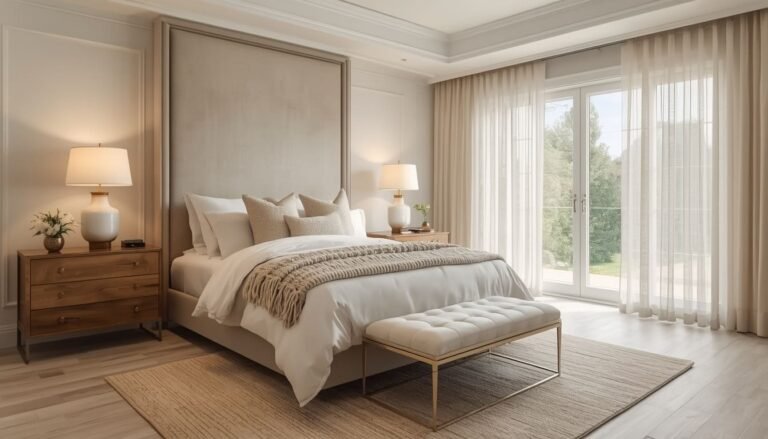
5. The Classic White Vanity Done Right
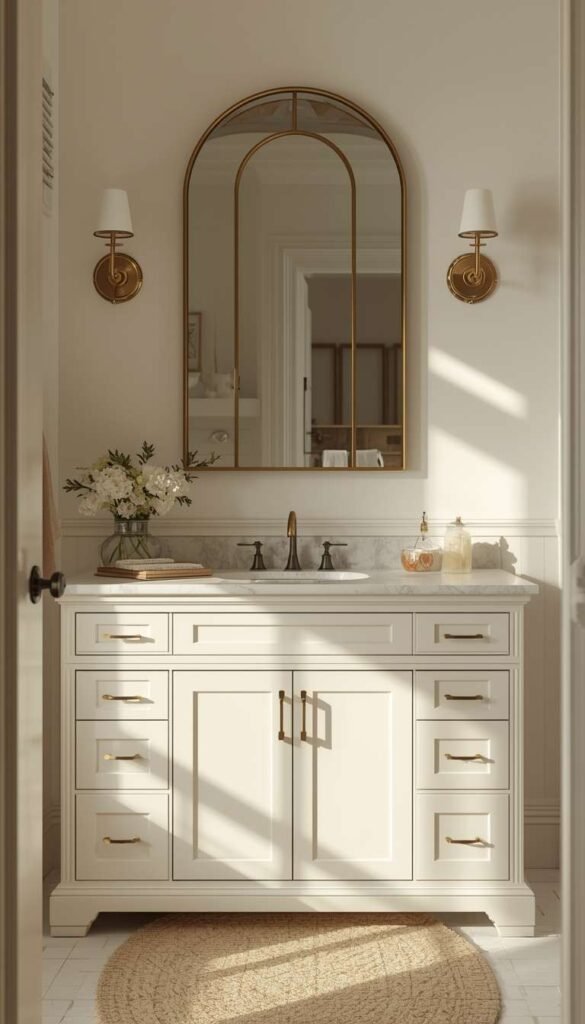
The white vanity is the backbone of almost every classic bathroom I’ve ever designed. But here’s where most homeowners go wrong they pick the first white vanity they see at a big box store, bring it home, and wonder why it looks cheap. The finish is everything. A flat, bright white reads as builder-grade almost immediately. What you want is something closer to an off-white or a soft linen tone with a shaker-style door front and solid brass or nickel hardware.
Benjamin Moore White Dove and Sherwin Williams Alabaster are my two go-to paint colors if you’re refinishing an existing vanity. Both have just enough warmth to keep the white from feeling clinical.
A few details that separate a great white vanity from a forgettable one:
- Inset doors instead of overlay doors they sit flush with the frame and look far more custom
- Soft-close hinges a small detail that signals quality immediately
- Legs or a furniture-style base instantly elevates the piece from bathroom fixture to statement furniture
Which classic bathroom element has been on your wishlist the longest the clawfoot tub, the marble countertop, the frameless glass door, or something else entirely?
6. Shiplap and Beadboard Picking the Right One for a Bathroom
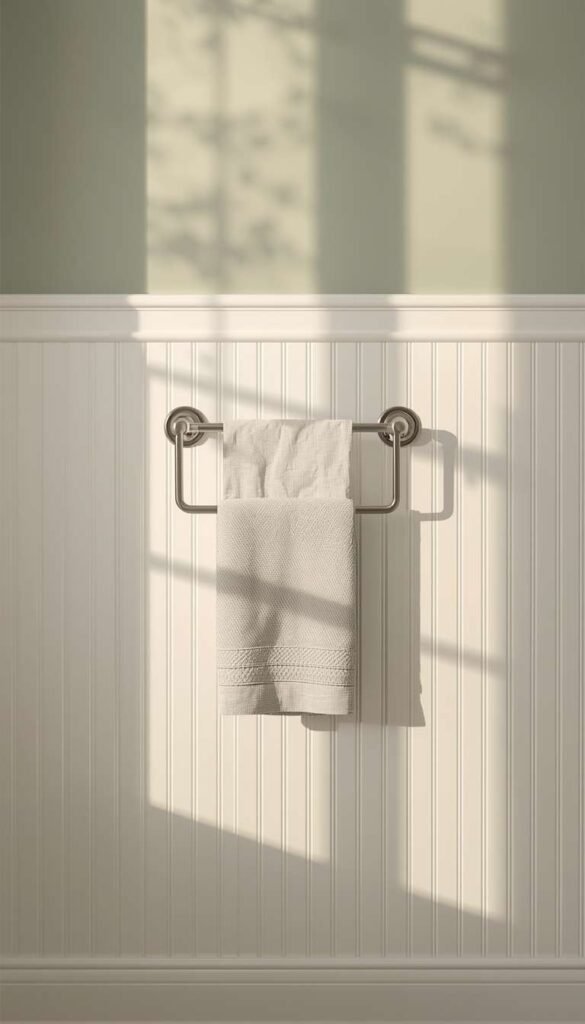
I get asked about this constantly, and the answer is simpler than most people expect. Both shiplap and beadboard are classic wall treatments that add tremendous character to a bathroom. The difference comes down to the look you’re going for and more importantly how well your bathroom is ventilated.
Beadboard is the more traditional of the two. Those vertical grooves have been a staple of American bathrooms since the Victorian era, and they work especially well in cottage style, farmhouse, and classic white bathroom designs. Shiplap reads as slightly more relaxed and modern-rustic. It’s the choice I lean toward when a client wants something with a little more visual weight on the walls.
One thing to watch out for is moisture. Real wood versions of both materials will warp in a poorly ventilated bathroom over time. I always recommend either PVC beadboard panels for high-humidity spaces or ensuring the exhaust fan is properly sized for the room before committing to any wood wall treatment.
Top 6 Best Classic Bathroom Ideas
| Idea | Estimated Price | Maintenance |
|---|---|---|
| Black & White Hex Floor Tile | $8 to $15 per sq. ft. installed | Low |
| Clawfoot Tub (Acrylic) | $600 to $1,200 installed | Medium |
| Real Marble Vanity Top | $200 to $600 per linear ft. | High |
| Frameless Glass Shower Door | $800 to $2,500 installed | Medium |
| Wainscoting & Panel Molding | $150 to $2,500 depending on method | Low |
| Budget Bathroom Refresh | $1,500 total estimated spend | Low |
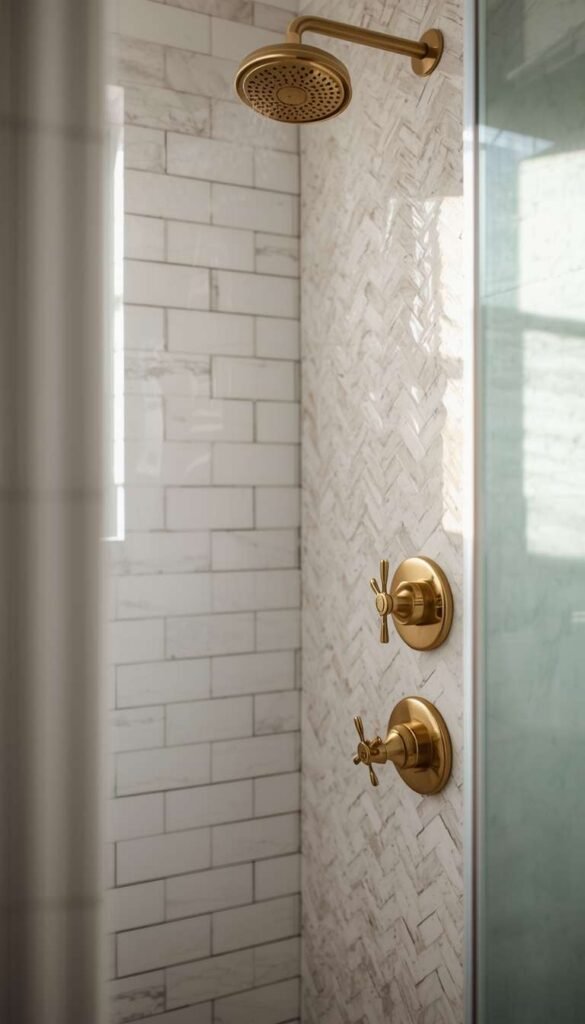
7. Gold, Brass and Polished Nickel Which Hardware Finish Actually Lasts
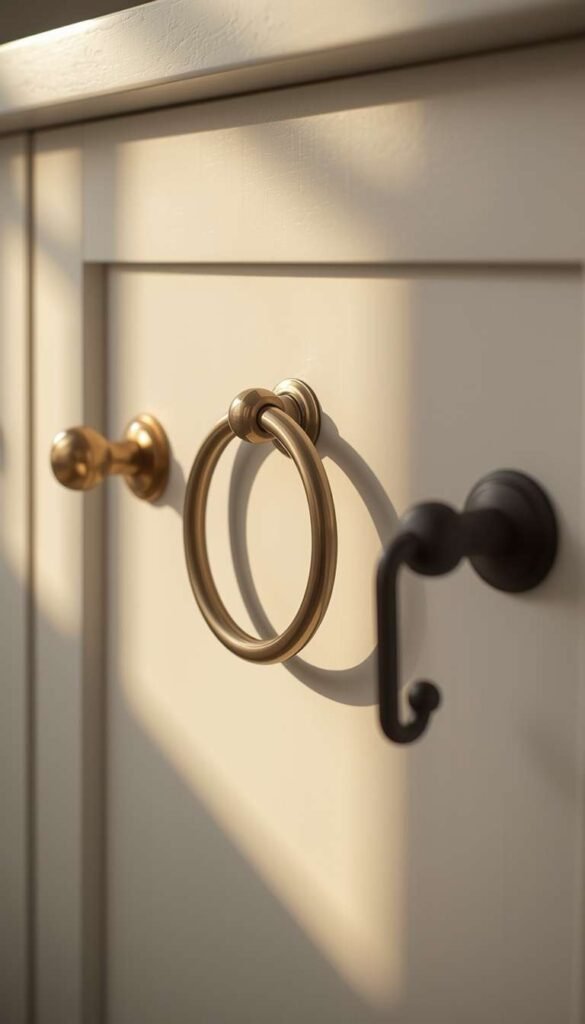
Hardware is one of those decisions that most homeowners treat as an afterthought, and then immediately regret. The finish you choose affects how the entire bathroom reads, and some finishes age far better than others in a real-world bathroom environment.
Polished nickel is my personal first choice for classic bathrooms. It has a warmth that chrome lacks, it doesn’t show water spots as aggressively, and it pairs beautifully with almost any color palette. Unlacquered brass is having a major moment right now and genuinely deserves its popularity it develops a natural patina over time that actually gets more beautiful with age. The one finish I steer most clients away from is regular polished brass. It tends to look dated quickly and the lacquer coating chips in high use areas within a few years.
Matte black is a strong choice for more dramatic classic bathrooms, but it shows soap residue and water mineral deposits more than any other finish. Beautiful in photos. High maintenance in reality.
8. The Pedestal Sink Elegant but Genuinely Impractical
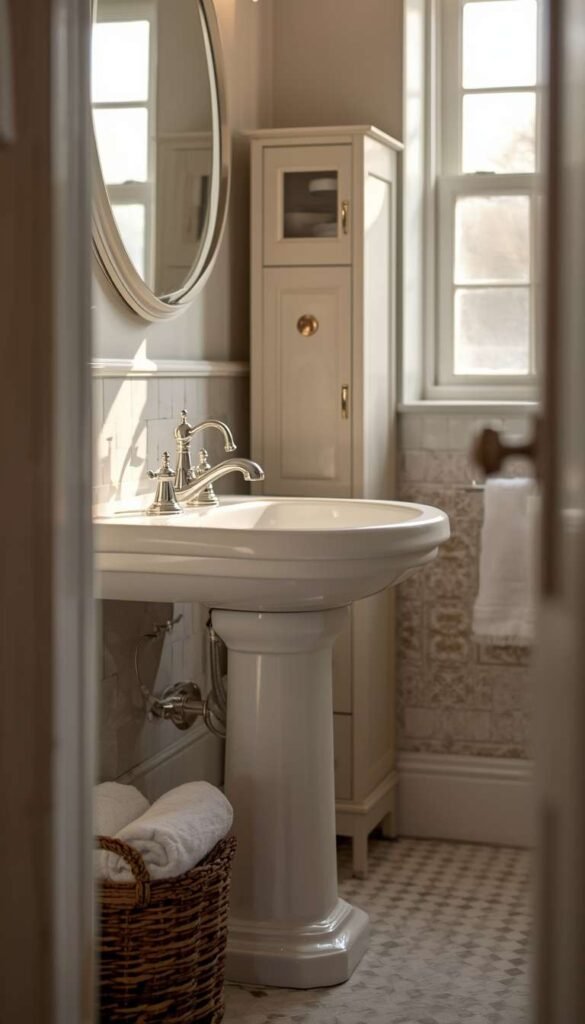
There is no sink silhouette more classically beautiful than a pedestal sink. It opens up floor space, it has a sculptural quality that no vanity cabinet can match, and it looks equally at home in a Victorian brownstone and a modern farmhouse bathroom. I love them. I also always warn my clients about the storage situation before we finalize anything.
A pedestal sink offers exactly zero storage. No drawers, no cabinet, no surface space beyond the basin itself. For a powder room that sees occasional guest use, that’s completely fine. For a primary bathroom where two people are getting ready every morning it’s a real problem.
Here’s how I solve it when a client is set on the pedestal look:
- A slim linen tower placed 12 to 18 inches from the sink keeps storage nearby without crowding the fixture
- A small tray on the tank lid of the adjacent toilet corrals everyday essentials
- Recessed wall niches flanking the mirror add storage without eating into floor space
The pedestal sink works beautifully when you plan the surrounding storage before installation not after.
9. Classic Bathroom Wallpaper Without the Regret
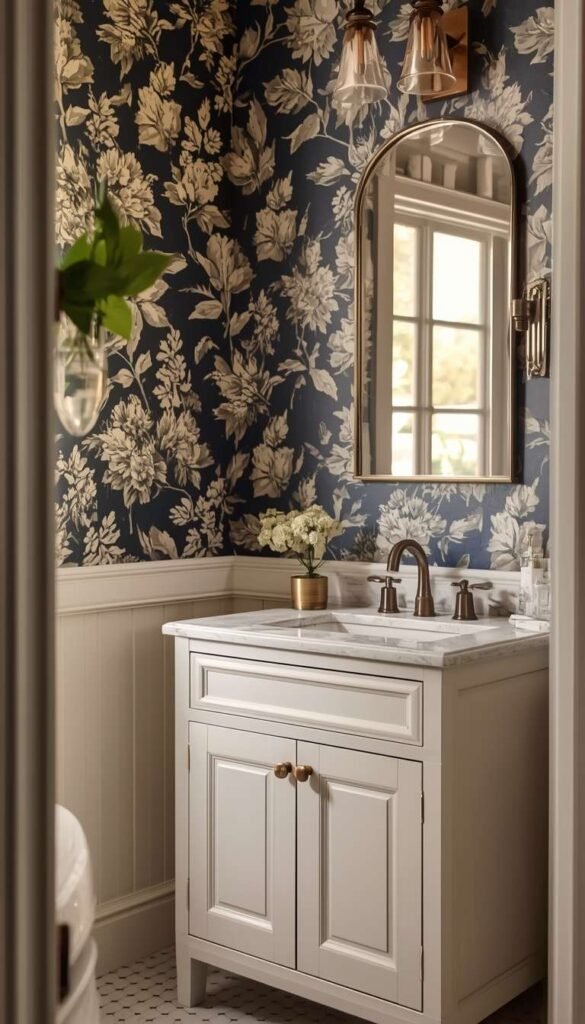
Wallpaper in a bathroom makes an immediate, undeniable statement. When it works, it works spectacularly. When it fails, you’re peeling bubbled seams off a damp wall six months later and questioning every decision you’ve ever made. I’ve seen both scenarios play out, and the difference almost always comes down to product selection and installation rather than the idea itself.
For classic bathroom wallpaper, toile prints, botanical patterns, and vintage inspired geometric designs are the three categories that consistently age well. They feel curated rather than trendy. In terms of material, vinyl coated wallpaper is the most moisture resistant option for full bathrooms. Peel and stick works surprisingly well in powder rooms with lower humidity I’ve had clients use it successfully for years in half baths.
Two things I always tell clients before they commit:
- Ventilation first if your exhaust fan isn’t properly sized, no wallpaper will survive long-term regardless of the material
- Paper just one wall if you’re nervous a single papered accent wall behind the vanity gives you 80% of the impact with significantly less commitment
10. Wainscoting and Panel Molding That Looks Custom

Panel molding is one of the highest return on investment upgrades in a classic bathroom, full stop. The right wainscoting can make a $200 vanity look like it belongs in a designer showroom. It adds architectural depth that painted walls simply cannot replicate, and it photographs beautifully every single time.
Traditional wainscoting typically runs to chair rail height about 32 to 36 inches off the floor. For bathrooms with higher ceilings, I often take it to 48 inches or even two thirds of the wall height for a more dramatic, enveloping look. The upper portion can be painted a complementary shade or papered for a layered effect that feels genuinely bespoke.
Here’s the honest cost breakdown most articles skip entirely:
- DIY MDF panel molding kit: $150 to $400 for an average bathroom a weekend project for a reasonably handy homeowner
- Contractor installed real wood wainscoting: $800 to $2,500 depending on ceiling height and room size
- PVC beadboard panels (moisture-resistant): $80 to $200 in materials, paintable and very DIY friendly
The look you get for the money is genuinely hard to beat anywhere else in a bathroom renovation.
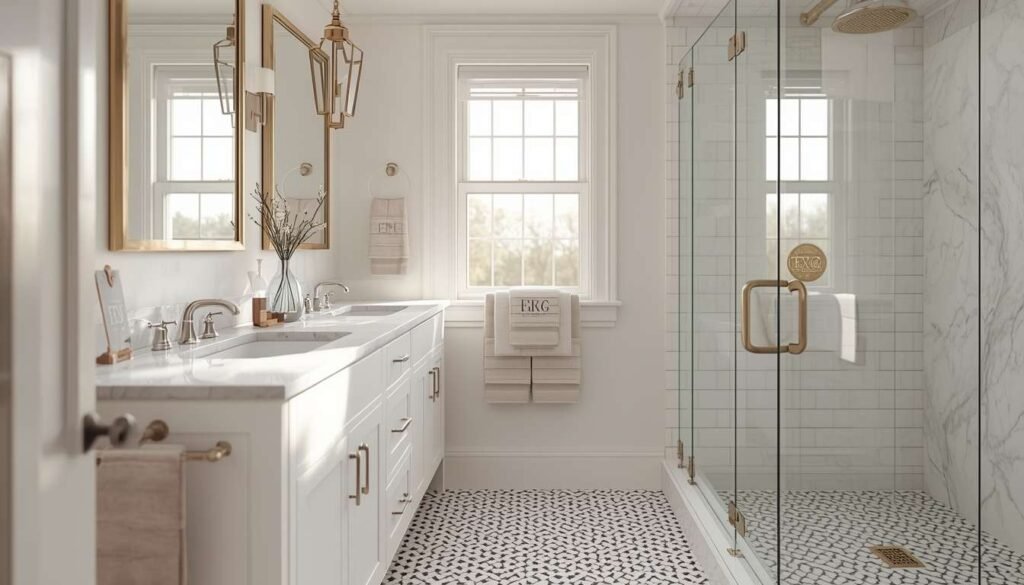
11. Frameless Glass Shower Doors the Single Upgrade That Changes Everything
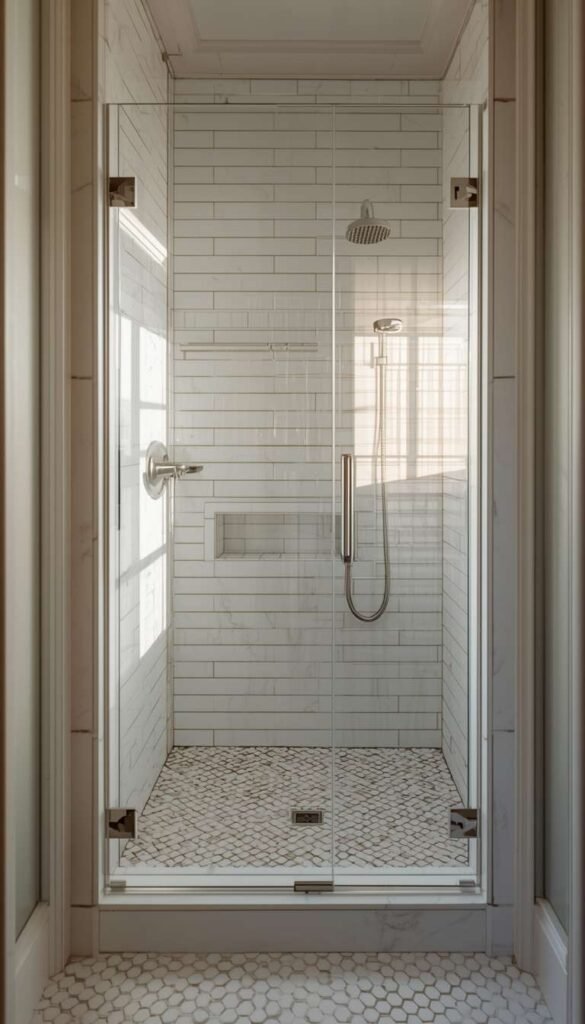
If I could give every homeowner in America one piece of advice for their classic bathroom, it would be this: replace your shower curtain or your framed shower door with a frameless glass panel. I have seen this single change make a $15,000 bathroom renovation look like it cost $40,000. It opens the space visually, it lets the tile work breathe, and it instantly communicates quality in a way that is very difficult to achieve through any other single upgrade.
The cost runs anywhere from $800 to $2,500 installed depending on the size of the opening and the glass thickness. Half-inch glass is worth the premium it feels substantial and moves with a satisfying weight that thinner panels simply don’t. One thing to watch out for is hard water buildup on clear glass in areas with mineral heavy tap water. A squeegee kept inside the shower and used after every other shower is all it takes to keep it looking pristine.
If you could change just one thing about your bathroom today, what would it be — the hardware, the lighting, the tile, or the overall color scheme?
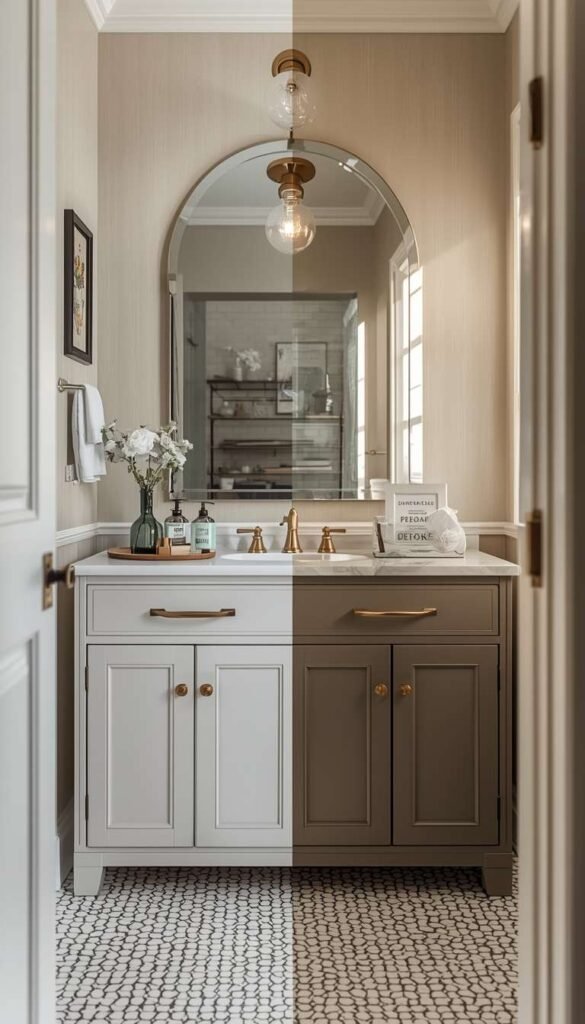
12. A Statement Mirror That Does More Than Reflect
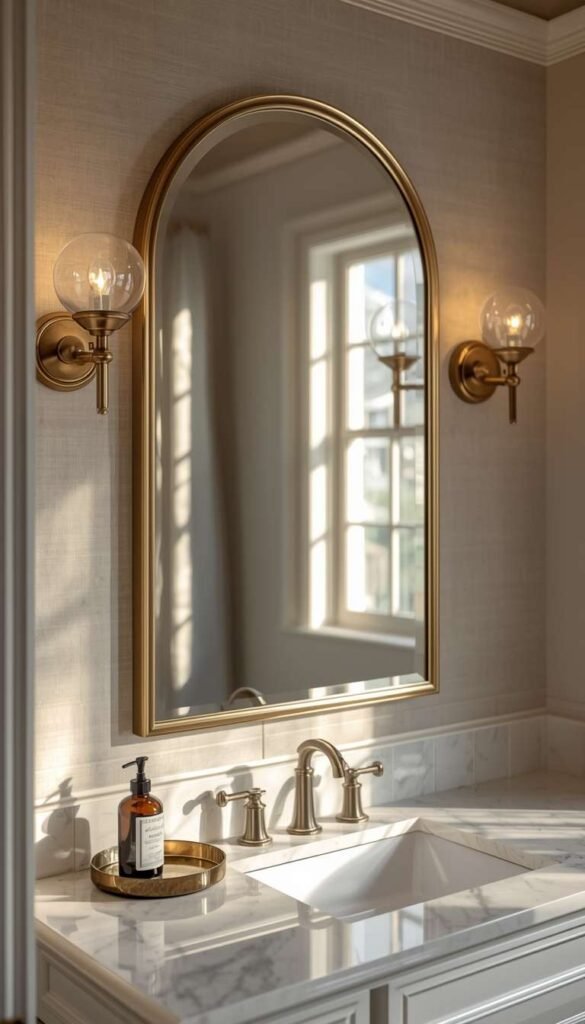
The mirror is one of the most underestimated design decisions in a classic bathroom. Most people treat it as a functional afterthought something to hang above the sink and forget about. The designers whose bathrooms end up on magazine covers treat it as a piece of furniture.
A quick trick I’ve used in dozens of projects is the 80% rule your mirror should be at least 80% as wide as your vanity. Anything narrower looks timid and disconnected from the vanity below it. For double vanities, you can either go with one long mirror spanning the full width or two matching mirrors centered above each sink both work beautifully in a classic scheme.
Frame styles that genuinely stand the test of time:
- Thin brass or gold frames elegant without competing with other hardware
- Arched top mirrors add architectural interest and soften rectangular bathrooms
- Beveled edge frameless mirrors the quietest option, but quietly stunning in the right space
Skip the medicine cabinet if you have adequate storage elsewhere. A beautiful mirror on a well lit wall beats a recessed cabinet almost every time from a pure design standpoint.
13. Vintage Inspired Lighting That Never Looks Dated
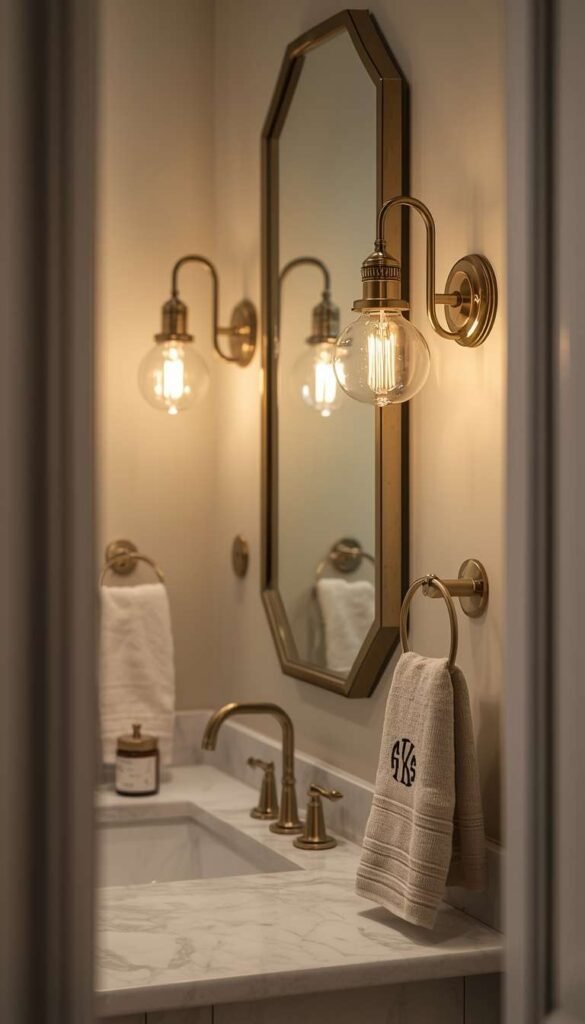
Lighting is the element that either makes a classic bathroom feel genuinely luxurious or exposes every shortcut taken elsewhere. I’ve walked into bathrooms with beautiful tile, gorgeous vanities, and stunning hardware all of it undermined by a single builder grade flush mount fixture that belonged in a 1994 apartment complex. The right lighting costs less than most people assume and does more heavy lifting than almost any other element in the room.
For classic bathrooms, there are three fixture styles I return to again and again because they photograph beautifully, age gracefully, and work across multiple design aesthetics:
- Wall sconces flanking the mirror the most flattering lighting position for a bathroom, period. They eliminate the under-eye shadows that overhead lighting creates and make the vanity area feel intentional and considered
- Lantern style pendants perfect above a freestanding tub or in a larger primary bath with higher ceilings. They bring a slightly formal quality that suits classic design beautifully
- Schoolhouse globe fixtures the most versatile option. They work in farmhouse, vintage, transitional, and modern classic bathrooms without missing a beat
One thing I always specify alongside the fixtures themselves is the bulb temperature. Stick to 2700K to 3000K for bathroom lighting. Anything cooler reads as clinical and harsh, which is the last thing you want in a space meant to feel like a retreat.
14. The Herringbone Tile Shower Wall
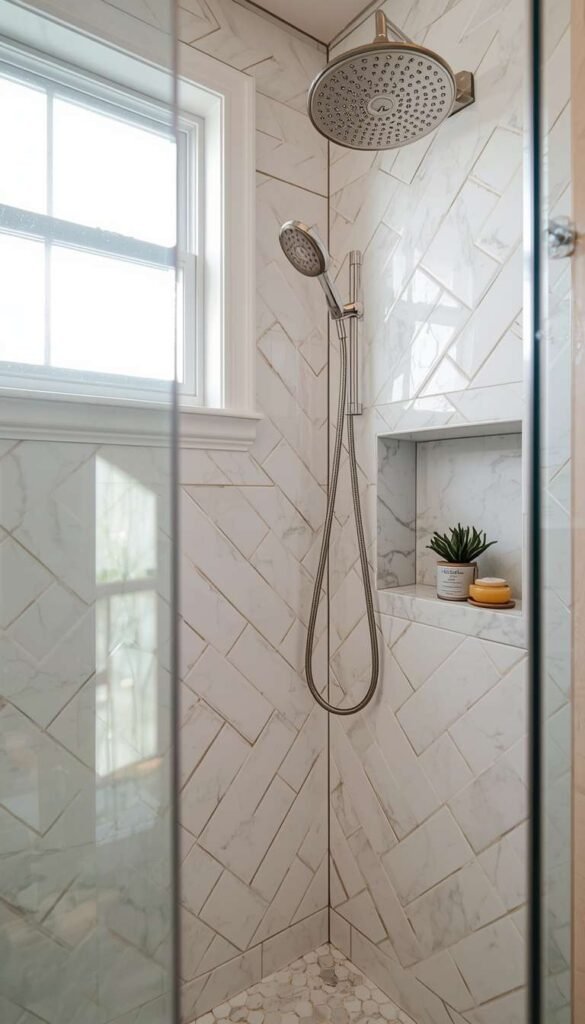
Herringbone pattern is one of those design choices that communicates craftsmanship without saying a word. There is something about the interlocked diagonal arrangement that reads as genuinely considered like someone cared about the details. I’ve specified it in shower walls, floor borders, and full bathroom floors, and it consistently elevates the entire space around it.
White 3×6 subway tile in a herringbone pattern on a shower wall is perhaps my single most recommended classic bathroom move for homeowners working with a mid-range budget. The tile itself is inexpensive. The installation is slightly more labor-intensive than a standard horizontal stack, which means your tile setter will charge a bit more typically 15 to 25% above a standard lay. Budget roughly $12 to $18 per square foot installed for a basic white ceramic herringbone shower wall, and you’ll be in reasonable territory for most US markets.
The pattern works best when the grout is kept tight and close in color to the tile. A stark contrast grout in a herringbone pattern can quickly become visually overwhelming. Soft gray or warm white grout keeps the focus on the movement of the pattern rather than the grid lines.
15. Classic Bathroom Color Schemes That Always Deliver
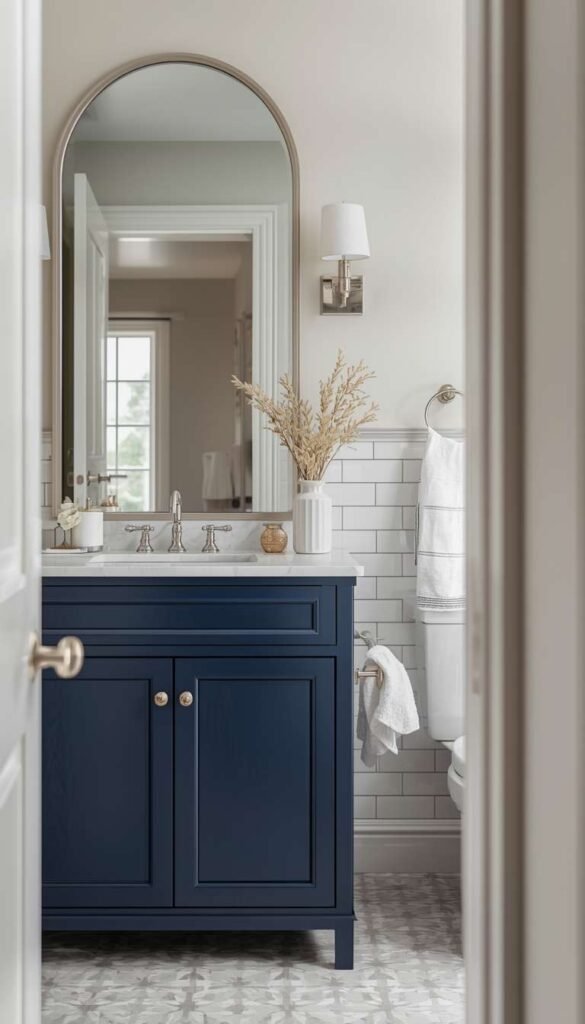
Color is where most homeowners either nail a classic bathroom or accidentally create something that feels more costume than considered. The palettes that truly stand the test of time are almost always rooted in restraint two to three colors maximum, with one doing the heavy lifting and the others providing support.
These are the three combinations I’ve used most successfully in classic US bathrooms:
- Navy and white crisp, confident, and timeless. Navy vanity with white walls and white marble countertop is a combination that works in a Colonial, a Craftsman, and a new construction home with equal elegance. Try Sherwin-Williams Naval on the vanity and Simply White by Benjamin Moore on the walls
- Sage green and warm cream softer and more organic. This palette has genuine staying power because it pulls from nature rather than trend cycles. Benjamin Moore’s Saybrook Sage paired with a creamy shiplap wall is one of my personal favorites
- Black and white the most timeless of all. Not cold, not stark, when done correctly. The key is adding warmth through wood tones, brass hardware, or a vintage rug to prevent the palette from feeling like a checkerboard
Whatever palette you choose, commit to it through every element towels, accessories, art. A cohesive color story is what separates a designed bathroom from a decorated one.
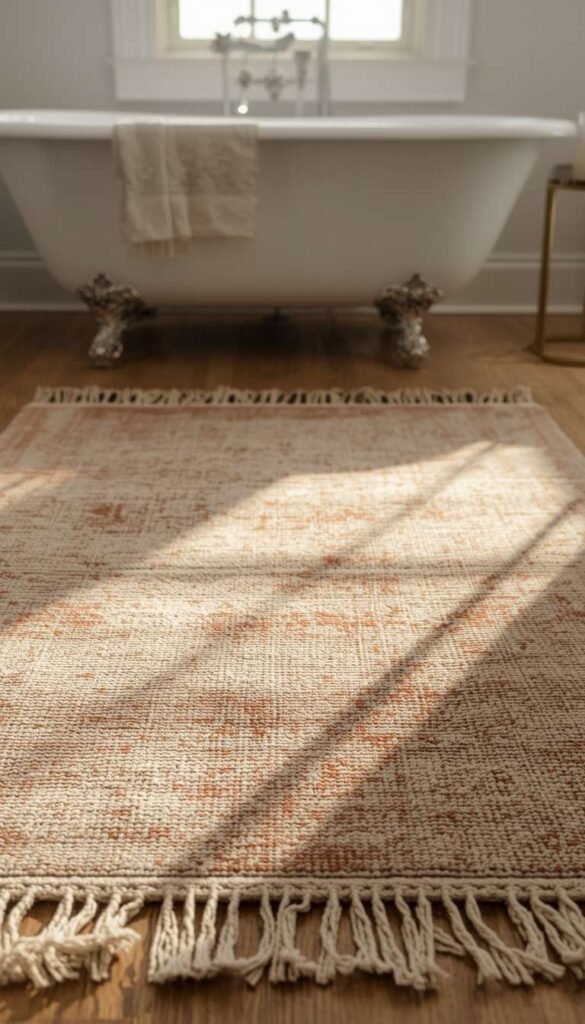
16. The Freestanding Soaking Tub in a Small Bathroom
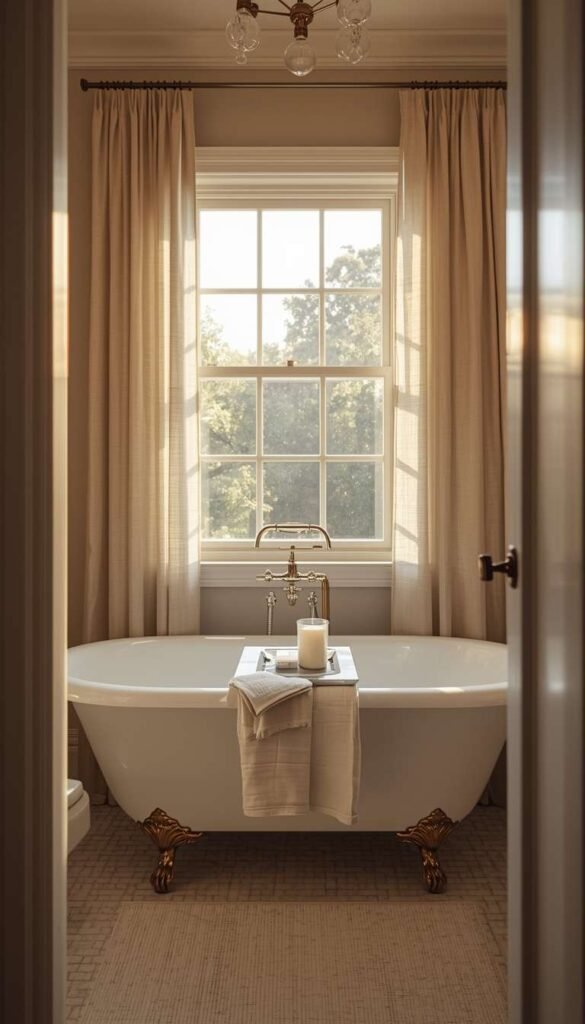
I want to address something that comes up constantly with my clients who have smaller bathrooms the belief that a freestanding tub is simply off the table if your square footage is limited. That’s not entirely true, but it does require some honest planning before you commit.
The minimum comfortable footprint for a freestanding tub in a bathroom is roughly 55 to 60 square feet of total floor space and that’s with a separate shower already accounted for elsewhere in the room. Anything smaller and the tub begins to feel crammed rather than luxurious, which defeats the entire purpose. A 55 inch slipper tub is the smallest freestanding silhouette worth considering it’s compact enough for tighter spaces while still offering a genuine soak rather than a glorified basin.
What makes a small bathroom freestanding tub work visually is placement. Centering it under a window is the classic choice and genuinely never fails. It draws the eye upward, floods the tub area with natural light, and creates a focal point that makes the room feel deliberately designed rather than spatially challenged. If a window isn’t available, positioning the tub on the wall directly opposite the door means it’s the first thing you see when you enter equally effective and equally classic.
Are you more of a ‘full renovation’ person or a ‘small upgrades over time’ kind of homeowner and has that approach worked for you so far?
17. Built In Storage That Looks Like It Was Always There
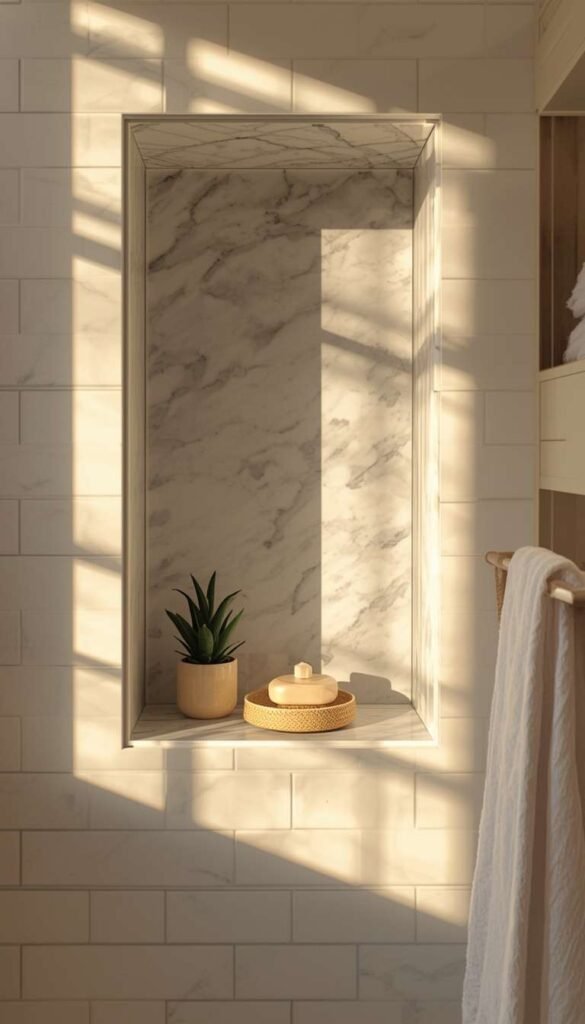
Storage is the unglamorous backbone of a functional classic bathroom, and getting it wrong is one of the fastest ways to undermine an otherwise beautiful space. Bottles lined up on a ledge, hair tools draped over a towel bar, a cluttered vanity counter none of it belongs in a bathroom that’s meant to feel like a retreat. The good news is that classic design actually gives you more built-in storage options than almost any other style, because architectural detail and cabinetry are already part of the vocabulary.
Recessed shower niches are my absolute first recommendation for any bathroom renovation with wall access. They cost relatively little to add during a tile job typically $150 to $300 in labor if planned before tiling begins and they eliminate the shower caddy entirely. One thing to watch out for is placement. The niche should never be cut into an exterior wall, as this can compromise insulation. An interior wall between the shower and an adjoining room is always the right choice.
Beyond the shower, these are the three storage solutions I return to most often in classic bathrooms:
- Linen towers flanking the vanity they frame the mirror beautifully while providing genuine cabinet storage for towels and toiletries
- Floating shelves with corbel brackets add storage and visual warmth simultaneously, particularly stunning in a white bathroom with wood shelves and brass brackets
- Under-vanity baskets for open vanities or pedestal sinks, a pair of matching woven baskets underneath corrals everyday items without looking improvised
18. The Wood Vanity That Brings Warmth to Everything
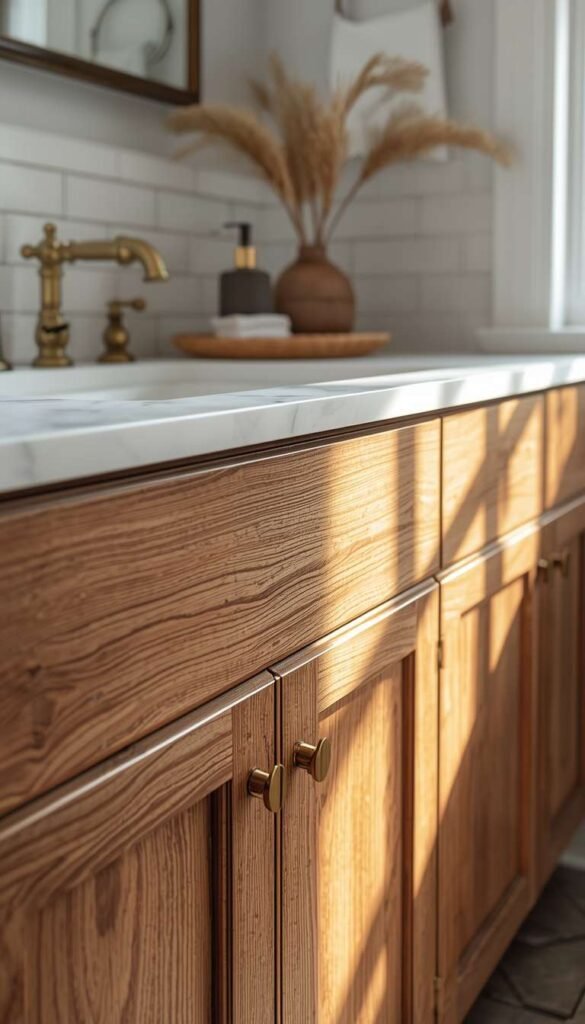
A wood vanity does something in a classic bathroom that no painted cabinet can fully replicate it introduces organic warmth that prevents the space from feeling sterile. White marble, white walls, white fixtures all beautiful, all potentially cold without a grounding element. A warm wood vanity is almost always that element, and it works across virtually every classic bathroom aesthetic from farmhouse to transitional to traditional.
The species choice matters more than most people realize when it comes to humidity tolerance. I’ve seen beautiful white oak vanities hold up flawlessly in well-ventilated bathrooms for over a decade. I’ve also seen cheaper engineered wood vanities begin to show moisture damage within two years in a poorly ventilated space.
Woods that genuinely handle bathroom humidity well:
- White oak my top recommendation. Beautiful grain, takes stain and natural finish equally well, humidity resistant with proper sealing
- Teak naturally water resistant due to its high oil content. More expensive but genuinely worth it in high use bathrooms
- Bamboo technically a grass but performs like a hardwood in humid environments. A surprisingly elegant and sustainable option
Whatever species you choose, make sure the vanity top is either stone or a sealed solid surface. A wood countertop in a bathroom requires significantly more maintenance than most homeowners are prepared for.
19. Classic Bathroom Accessories That Pull Everything Together
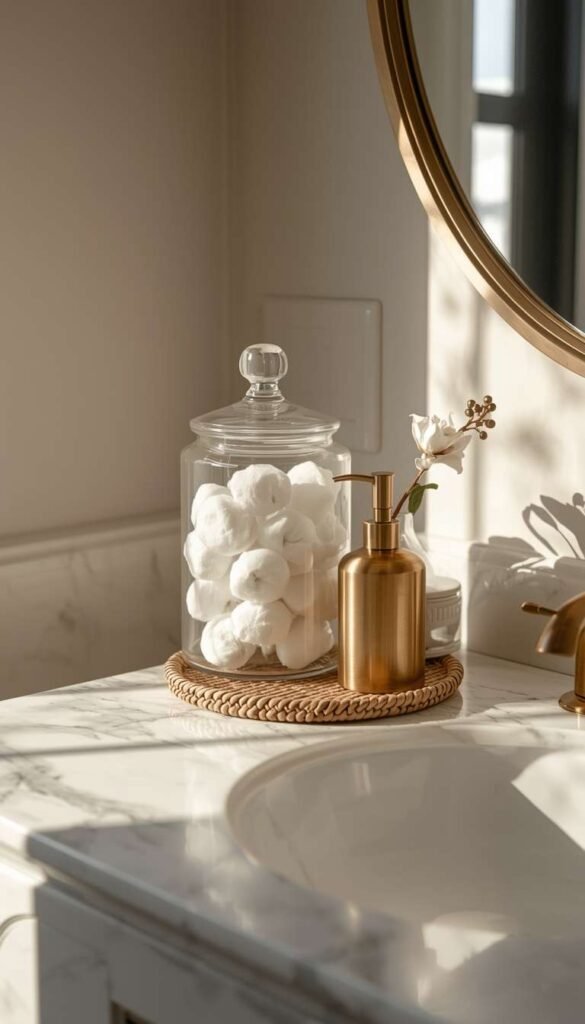
This is where the personality lives. You can have the most beautifully tiled, perfectly lit, expertly vanity ed bathroom in the world and if the accessories are an afterthought, the space will still feel somehow unfinished. I’ve noticed that the bathrooms that stop people in their tracks almost always have a considered accessory moment that tells you a real person with real taste lives there.
The rule I follow in my own projects is what I call the rule of three for counter styling. Keep the vanity counter to three intentional objects maximum a soap dispenser, a small tray or dish, and one decorative element like a bud vase or a small candle. Everything else lives in a drawer. This restraint is what separates a styled bathroom from a cluttered one.
For classic bathrooms specifically, these accessory categories consistently deliver:
- Apothecary glass jars for cotton balls and swabs they look like they’ve been there for generations
- Monogrammed linen hand towels an immediate signal of intentionality that costs very little
- A single stem in a narrow brass vase more impactful than a full floral arrangement and far easier to maintain
Hardware consistency matters enormously here too. Your towel rings, robe hooks, toilet paper holder, and cabinet pulls should all share the same finish. Mixing two finishes can work beautifully when done intentionally mixing three starts to look like indecision.
20. Vintage Rugs in the Bathroom Navigating the Yes or No
Few design decisions generate more debate in the classic bathroom world than the vintage rug. Design editors love them. Practical homeowners are deeply suspicious of them. Having specified them in real projects and lived with the results, my answer is a genuine it depends and the conditions under which it works versus doesn’t work are pretty specific.
A vintage or vintage-style rug works beautifully in a bathroom when the rug lives away from the direct splash zone think centered in front of a freestanding tub, or placed in a larger primary bath where it anchors a seating area rather than sitting directly in front of the sink where wet hands and splashing water will reach it daily. Natural fiber rugs like wool or cotton clean up far better than synthetic alternatives and don’t hold odors the way cheaper materials do.
Here is where I’d steer you away from the vintage rug entirely:
- Small bathrooms where the rug will inevitably sit in the high splash zone in front of the sink
- Homes with pets or young children where bathroom rugs become genuinely unhygienic very quickly
- Bathrooms without windows or adequate ventilation where moisture lingers and rugs stay damp
If you love the look but have any of the above conditions in play, a washable vintage-style cotton rug gives you the aesthetic without the maintenance anxiety. Several brands now make remarkably convincing versions that go straight into the washing machine.
21. Small Classic Bathroom Ideas That Actually Work
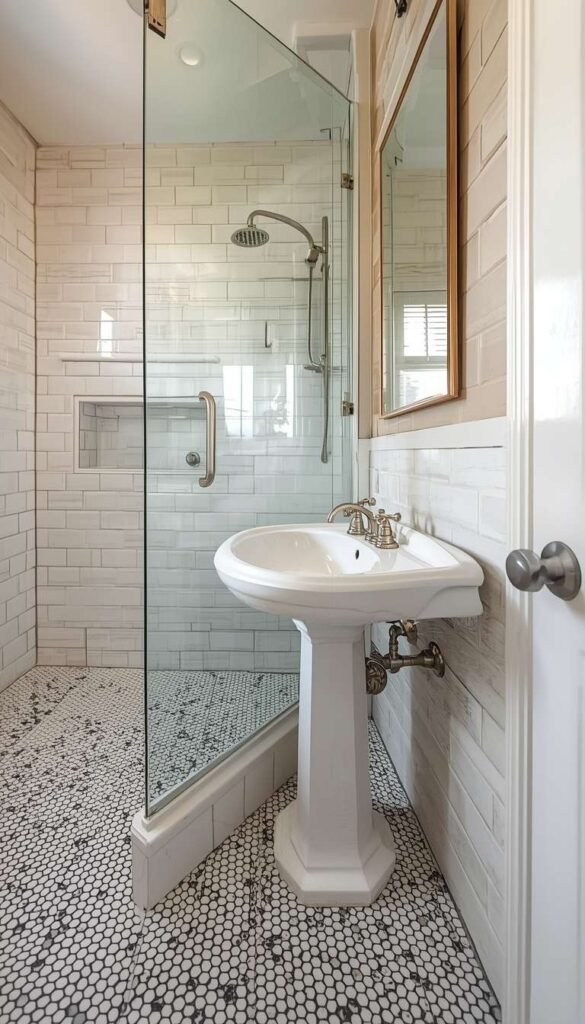
Small bathrooms are where classic design either truly shines or completely suffocates and the difference comes down to a handful of decisions made before a single tile is laid. I’ve designed bathrooms as small as 35 square feet that felt genuinely luxurious, and I’ve walked into 80-square-foot bathrooms that felt cramped and chaotic. Square footage is far less important than most people believe. Proportion, light, and intentional material choices are what actually determine how a small bathroom feels to be inside.
The single most impactful decision in a small classic bathroom is the floor tile. Counterintuitively, a smaller tile like a 2 inch hex or a classic penny tile actually works better in a tight space than large format tiles do. Large tiles require cuts along every edge in a small room, which creates a fragmented, busy look. Small tiles flow continuously and let the eye move through the space without interruption.
Specific layout and design moves that genuinely expand a small classic bathroom visually:
- Floor to ceiling tile on one wall usually the shower wall draws the eye upward and adds perceived height without touching the footprint
- A pedestal sink instead of a vanity cabinet frees up floor space dramatically and keeps the room from feeling boxed in
- A large mirror that spans most of the vanity wall the oldest trick in the design book, and it works every single time without exception
- Consistent color from floor to wall using the same or very similar tones throughout removes visual boundaries and makes the room read as larger than it is
One thing I’ve noticed consistently in small classic bathrooms that work well is that they commit fully to their material palette. Two materials maximum perhaps white subway tile and black hex floor executed beautifully, beats five materials executed adequately every single time.
What is the one design detail in your current bathroom that you absolutely cannot wait to replace and what are you replacing it with?
22. The Budget Classic Bathroom Refresh Under $1,500
This is the section I wish every classic bathroom article would include because the reality is that most American homeowners are not working with a $30,000 renovation budget, and the design world doesn’t serve them nearly well enough. A genuinely beautiful classic bathroom refresh is absolutely achievable for under $1,500 if you know exactly where to spend and where to save.
The framework I use with budget-conscious clients is simple: spend on what you touch every day and save on what you only look at. That means quality hardware and fixtures are worth the investment. Decorative accessories and soft goods are where you pull back.
Here is a realistic $1,500 classic bathroom refresh broken down by category:
- Hardware swap — $80 to $150: Replacing every builder-grade knob, pull, towel bar, and toilet paper holder with brushed nickel or unlacquered brass versions is the single highest-impact low-cost upgrade available. Shop Rejuvenation’s sale section or Amazon’s Franklin Brass line for quality at accessible prices
- Mirror upgrade — $150 to $300: Swap a frameless builder mirror for an arched or brass-framed version. Wayfair and Target’s Threshold line both carry genuinely good options in this price range
- Lighting fixture — $100 to $250: A schoolhouse globe sconce or a simple lantern-style vanity light replaces a builder fixture in under an hour with a screwdriver and transforms the entire vanity wall
- Paint or peel-and-stick wallpaper — $50 to $200: One papered or freshly painted accent wall behind the vanity changes the entire character of the room for minimal investment
- Accessories and textiles — $100 to $200: New hand towels, a soap dispenser, an apothecary jar set, and a simple bud vase. Keep the finish consistent with your new hardware
- Peel-and-stick floor tile — $200 to $400: Applied directly over existing flooring in good condition, quality peel-and-stick hex or black and white tile is remarkably convincing and genuinely durable in a low-traffic bathroom.
Your 2 Minute Classic Bathroom Decision Map
By Budget
Starter/Refresh (Under $1,500)
- Swap all hardware to brushed nickel or brass
- Add peel-and-stick black and white hex floor tile
- Replace builder mirror with an arched or framed version
- Paint vanity in Benjamin Moore White Dove
- Add wallpaper to one accent wall only
- Style counter with the rule of three accessories
Luxury/Investment ($5,000 and above)
- Install real Carrara or Calacatta marble vanity top
- Spec a cast iron clawfoot or freestanding soaking tub
- Add frameless half-inch glass shower door
- Install custom inset white shaker vanity with soft-close hardware
- Lay herringbone subway tile floor to ceiling in shower
- Add recessed shower niches during tile installation
By Lifestyle
Busy Families
- Choose gray grout — never white — on all tile surfaces
- Skip vintage rugs near the sink splash zone entirely
- Go acrylic tub over cast iron for easier cleaning
- Opt for PVC beadboard panels instead of real wood in humid spaces
- Built-in linen tower over open shelving for concealed storage
Design Lovers and Empty Nesters
- Commit fully to unlacquered brass hardware for living patina
- Layer a vintage wool rug in front of the freestanding tub
- Paper all four walls with a classic toile or botanical print
- Invest in a copper or cast iron statement tub as the room’s centerpiece
- Use real marble floors sealed twice yearly for authentic luxury
Frequently Asked Questions
What makes a bathroom design truly timeless?
Timeless bathrooms rely on restraint classic materials like marble and subway tile, a two to three color palette, and quality hardware that won’t date itself in five years.
How much does a classic bathroom renovation cost in the USA?
The average cost runs $8,000 to $25,000 for a mid-range classic bathroom remodel. A cosmetic refresh using paint, hardware, and a new mirror can come in well under $1,500.
Is marble worth it in a bathroom?
Yes, but only if you’re prepared to seal it every six to twelve months. For low-maintenance households, a quality porcelain marble lookalike on the floor with real marble reserved for the vanity top is the smarter move.
What hardware finish is most timeless for a classic bathroom?
Polished nickel and unlacquered brass are the two finishes designers consistently return to. Both age beautifully, pair with almost any color palette, and never read as trendy.
Can I create a classic bathroom look on a tight budget?
Absolutely start with hardware, lighting, and a framed mirror. These three swaps alone can shift a builder-grade bathroom into something that feels genuinely designed without touching a single tile.
Conclusion
Your classic bathroom is closer than you think and you don’t need a contractor, a massive budget, or a complete gut renovation to get there. Start with one thing today. Order a brass hardware set. Pick up a paint sample of White Dove. Pull that builder mirror off the wall and see what an arched replacement would look like in its place. Small moves made with intention are how every great room actually begins, and your bathroom deserves that same level of care. So tell me which of these 22 ideas are you tackling first? Drop it in the comments, I’d genuinely love to know.