12 Kitchen Shelves Instead of Cabinets Ideas That Look Stylish
Upper cabinets are officially optional and honestly, your kitchen might look better without them.I’ve worked with dozens of homeowners across the US who were terrified to ditch their upper cabinets, convinced their kitchen would turn into a cluttered mess. Every single one of them came back and said it was the best decision they made. Kitchen shelves instead of cabinets ideas have completely changed the way we think about storage, style, and breathing room in the most-used space in the home. Whether you’re working with a tight budget, a small galley kitchen, or a sprawling open-plan layout, there’s an open shelving approach that fits your life and your aesthetic.
My Design Notes
A few years ago, I was working on a kitchen renovation in Austin, Texas a 1970s ranch-style home with a layout that felt dark, cramped, and completely disconnected from the rest of the house. My clients had an $800 budget and a big dream. Instead of pushing for new cabinets, I convinced them to pull the uppers off one wall entirely and replace them with three floating walnut shelves fitted with matte black iron brackets. They were nervous. I was confident. We spent one afternoon styling those shelves together stacking white ceramic bowls, tucking in a small potted herb, and leaning a couple of worn cookbooks against the wall. The transformation was immediate. Light bounced across the room in a way it never had before. Three weeks later, my client texted me a photo her husband had reorganized the shelves on his own for the first time ever. That’s the quiet power of open shelving. It makes people actually care about their kitchen again.
Stunning Open Shelving Kitchen Ideas That Prove You Never Needed Those Cabinets
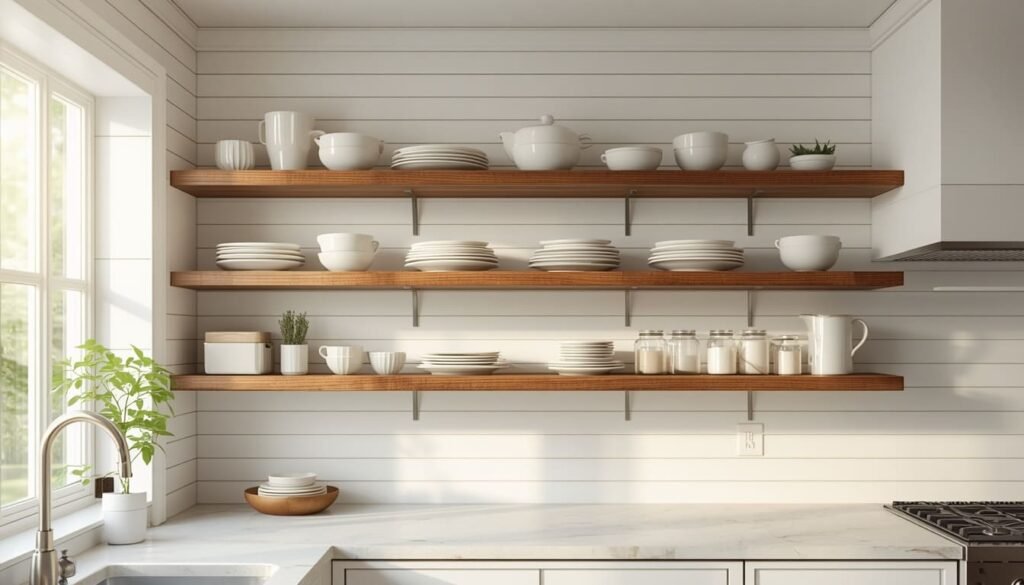
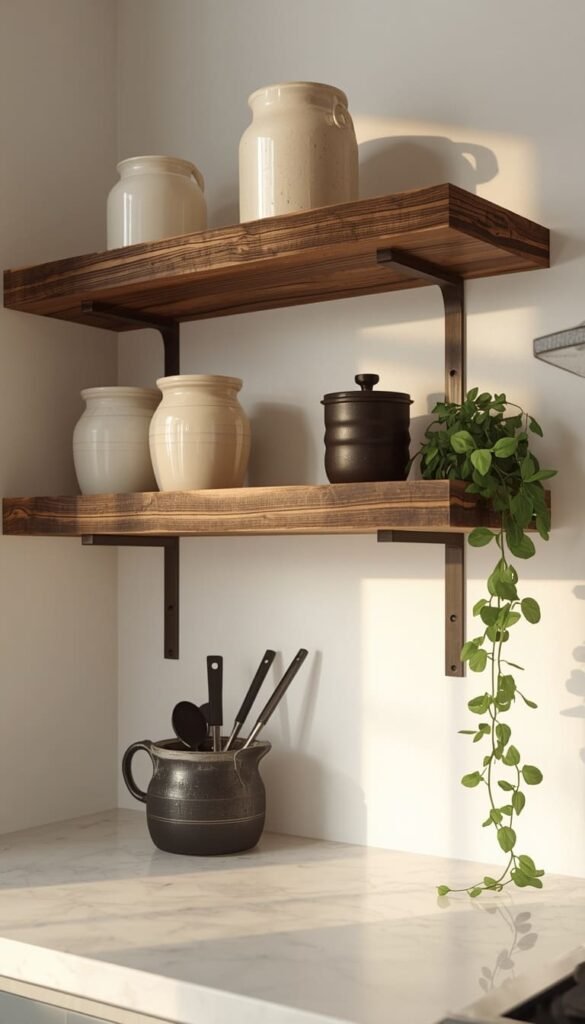
1. Floating Wood Shelves That Bring Warmth to Any Kitchen Style
There is something about a wooden shelf that just feels right in a kitchen. It does not matter if your space is modern, farmhouse, transitional, or somewhere in between wood brings a layer of warmth that painted cabinets simply cannot replicate. I have recommended floating wood shelves to clients in sleek Manhattan apartments and cozy suburban homes in Nashville alike, and the result is always the same: the kitchen instantly feels more lived-in, more personal, more real.
The key is choosing the right wood tone for your existing palette. Light oak or maple works beautifully in bright, white kitchens where you want to keep things airy. Walnut or dark-stained wood creates stunning contrast against white subway tile or light grey walls. And if you are going for that classic American farmhouse feel, reclaimed or knotty pine with visible grain is your best friend.
A quick trick I have learned over the years always go thicker than you think you need. A shelf that is at least 2 inches thick reads as intentional and architectural. Thin shelves tend to look like an afterthought, and in a kitchen, that gap between “designer look” and “hardware store fix” is very visible.
One thing to watch out for is weight capacity. Wood floating shelves need to be anchored into wall studs, not just drywall. If you are loading them up with cast iron skillets or heavy ceramic dishware, get a professional to install them or at minimum use heavy-duty bracket systems rated for the load.
2. Glass Shelves With Brass Brackets for a Modern Glam Look
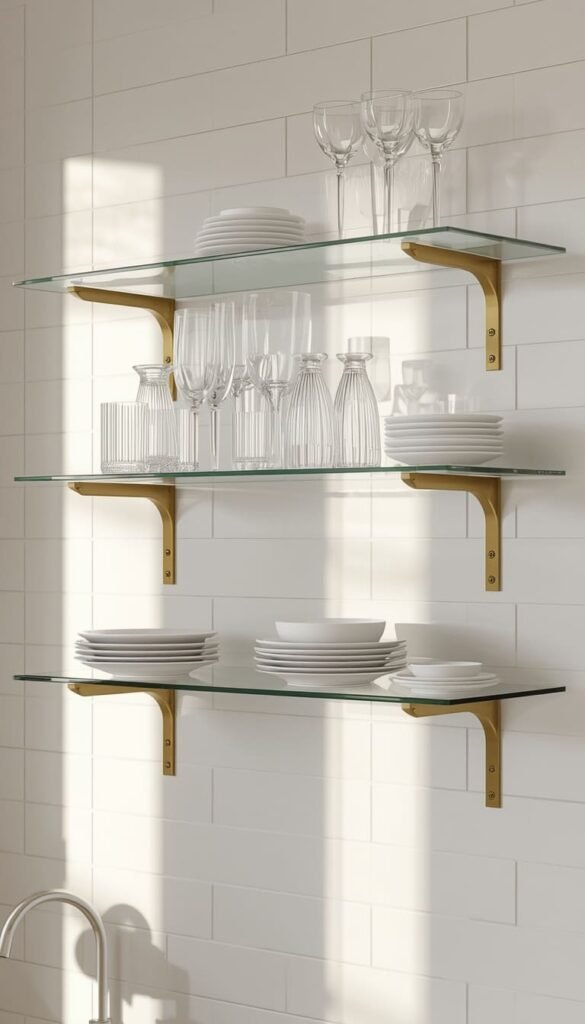
If wood shelves feel too rustic for your taste, glass shelves with brass or gold brackets are the answer. This combination is having a serious moment in American kitchen design right now, and I completely understand why. The glass keeps the wall feeling open and light-filled while the brass adds just enough warmth to prevent the look from feeling cold or clinical.
I recently used this exact approach in a kitchen in Scottsdale, Arizona a very clean, modern space with white quartz countertops and flat-front cabinetry. We installed two glass shelves with unlacquered brass brackets on either side of the range hood, and the entire kitchen transformed from “nice and neutral” to genuinely elegant.
Here is what makes this combination work so well:
- Glass reflects light instead of absorbing it, which keeps the kitchen feeling bright even in north-facing rooms
- Brass hardware ties naturally into faucets, cabinet pulls, and pendant lights for a cohesive finish
- The transparency of glass means even a crowded shelf looks visually lighter than a wood shelf holding the same items
The honest downside? Glass shelves show fingerprints and water spots quickly. If you have young kids or a busy household, factor in a weekly wipe-down with a streak-free cleaner. It is not a dealbreaker — just a reality worth knowing before you commit.
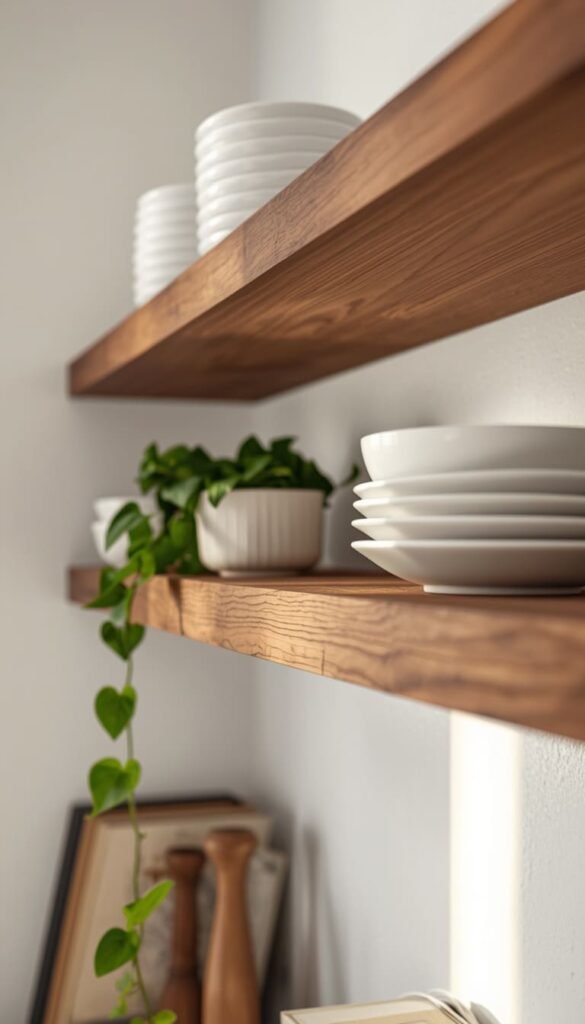
3. Rustic Reclaimed Wood Shelves for a Farmhouse Kitchen Feel
Reclaimed wood shelves are one of those ideas that look like they cost a fortune but can actually be one of the most affordable options on this list. Salvaged barn wood, old pine planks, or even lumber from a deconstruction yard can be sanded, sealed, and mounted for a fraction of what you would spend on custom cabinetry.
What makes reclaimed wood so special in a farmhouse kitchen is the imperfection. The knots, the grain variations, the slight color inconsistencies all of it reads as authentic and handcrafted in a way that no factory-finished shelf ever will. I always tell my clients: the character in that wood took decades to develop. You are not buying a shelf, you are buying a story.
Pair these shelves with simple iron or oil-rubbed bronze brackets and keep your styling equally grounded. Think stacked cream and white ceramic dishware, a small cast iron pot used as a utensil holder, and a trailing pothos or small herb plant tucked at one end. That combination alone photographs beautifully and stays true to the farmhouse spirit without feeling costume-y or overdone.
One thing to watch out for with reclaimed wood is sealing. Raw or poorly sealed wood in a kitchen will absorb grease and moisture over time, leading to staining and warping. Always apply at least two coats of a food-safe polyurethane or a hard wax oil finish before mounting. That one extra step protects your investment for years.
4. The Coffee Bar Shelf Setup That Makes Mornings Feel Like a Ritual
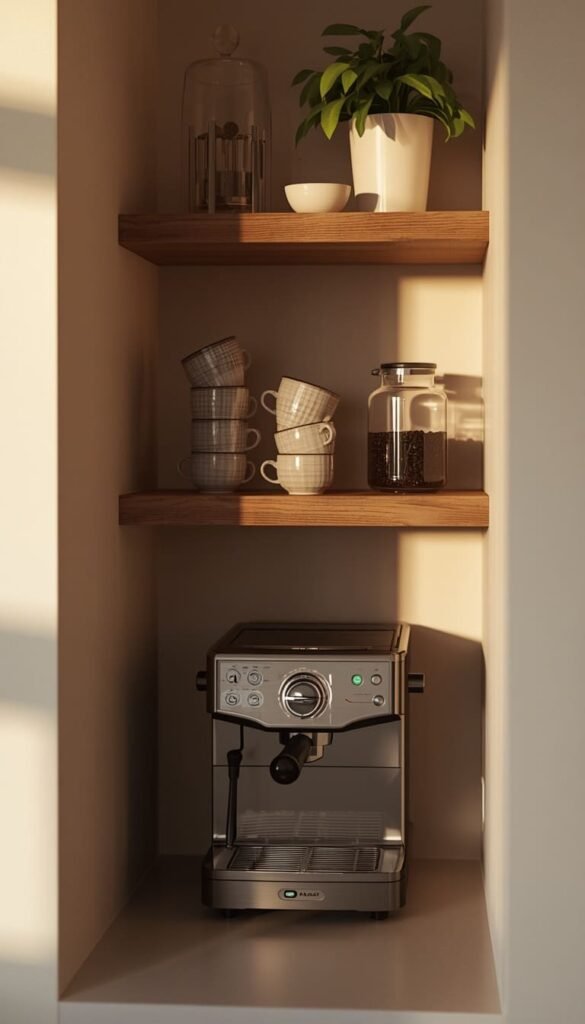
This one is personal for me. I am a firm believer that a dedicated coffee bar shelf is one of the highest-return upgrades you can make in a kitchen not just aesthetically, but practically. When everything you need for your morning routine lives in one beautiful, organized spot, the whole start of your day shifts.
The setup does not need to be complicated or expensive. Two floating shelves mounted above your counter space or tucked into a niche if you have one is genuinely all it takes. The lower shelf holds your espresso machine or drip coffee maker. The upper shelf is where the styling happens: stacked mugs, a small glass canister of coffee beans, a tiny plant, maybe a framed print leaning against the wall.
What separates a coffee bar shelf that looks curated from one that looks cluttered is editing. Keep only what you actually use every single morning on those shelves. Everything else gets stored elsewhere. I worked with a client in Charleston, South Carolina who had seventeen mugs on her coffee bar shelf when we started. We brought it down to four her absolute favorites and the space went from chaotic to catalog-worthy overnight.
If your kitchen does not have an obvious niche or dedicated wall for this, look at the end of a cabinet run. That narrow slice of wall beside the refrigerator or at the edge of your upper cabinets is often completely wasted. Two shelves there, properly styled, can become the most photographed corner of your entire home.
5. Built-In Shelves That Look Like They Came With the House
Built-in shelves are the gold standard of open kitchen storage. When done right, they look so seamlessly integrated into the architecture of the space that guests assume they were original to the home. That is exactly the effect you want intentional, permanent, and polished.
The secret to achieving that built-in look is extending the shelving all the way to the ceiling and matching the shelf material or paint color to your existing cabinetry. When everything speaks the same visual language, the shelves stop looking like an addition and start looking like a design decision that was always meant to be there.
Built-ins work especially well in these situations:
- Kitchens with awkward alcoves or recessed walls that standard cabinets cannot fill cleanly
- Open plan homes where the kitchen flows into a dining or living area and you want the storage to feel architectural rather than utilitarian
- Older homes where you want to honor the original character of the space with something that feels custom and crafted
The investment is higher than floating shelves expect to spend anywhere from $500 to $2,500 depending on size, material, and whether you hire a carpenter or tackle it as a DIY project. But the payoff in both function and resale value makes it one of the smartest kitchen upgrades on this list.
Which one shelf idea from this list would you try first in your kitchen and what is currently sitting in that spot right now?
6. Small Kitchen Open Shelving Tricks That Make Tight Spaces Feel Bigger
Small kitchens are where open shelving truly earns its reputation. Upper cabinets in a compact kitchen can feel like walls closing in on you visually heavy, low-ceiling-emphasizing, and relentlessly boxy. Swap even one run of upper cabinets for open shelves and the entire room exhales.
I have transformed some genuinely tiny kitchens we are talking galley layouts under 100 square feet simply by opening up the wall space above the counter. The moment those cabinet boxes come down, light moves differently through the room. The ceiling feels higher. The countertop feels wider. It is one of those changes that costs relatively little but reads as a full renovation.
For small kitchens specifically, keep shelves narrow 10 to 12 inches deep is plenty and leave breathing room between items. Overcrowding a shelf in a small kitchen amplifies visual noise rather than reducing it. Stick to a tight color palette on the shelves: whites, naturals, and one accent color maximum. Everything else gets stored behind closed doors in your lower cabinets.
One rule I never break in small kitchens: the top shelf should always have something with height. A tall vase, a stack of cookbooks standing upright, or a slender plant draws the eye upward and makes the ceiling feel further away than it actually is. It is a small trick with a genuinely big impact.
Top 6 ideas:
| Idea | Estimated Price | Maintenance |
|---|---|---|
| Floating Wood Shelves | $150 – $400 | Medium |
| Glass Shelves With Brass Brackets | $200 – $600 | High |
| Rustic Reclaimed Wood Shelves | $80 – $250 | Medium |
| Built-In Shelves | $500 – $2,500 | Low |
| Coffee Bar Shelf Setup | $60 – $200 | Low |
| DIY Open Shelves | $40 – $120 | Low |
7. The Symmetry Shelf Strategy That Interior Designers Always Use
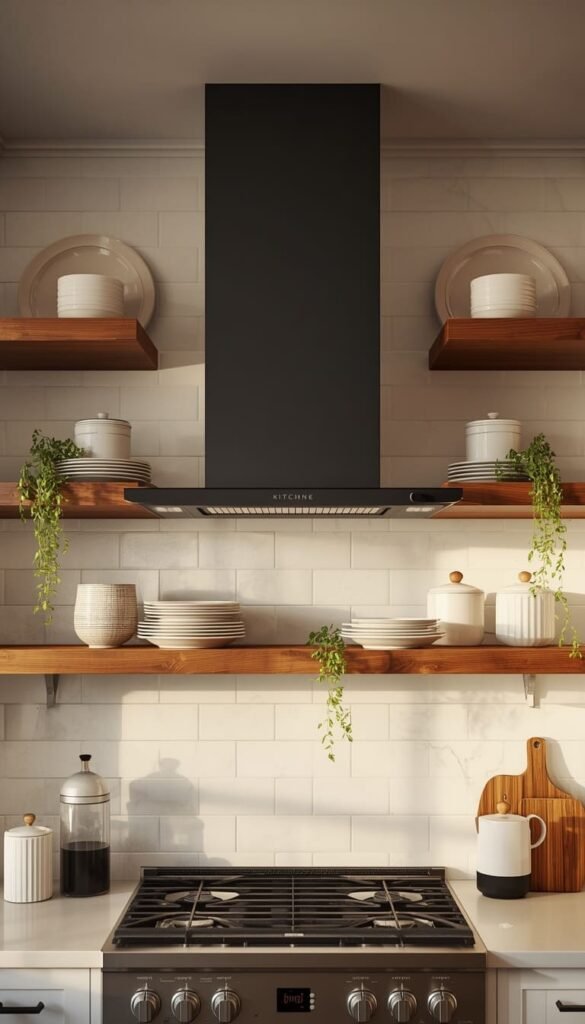
Symmetry is one of those design principles that works almost every single time, and nowhere is it more effective than in a kitchen with open shelving. When shelves are placed in mirrored pairs flanking a window, framing a range hood, or running evenly on either side of a focal point the entire kitchen reads as intentional and composed rather than random.
This is actually one of the first things I assess when a client wants to add open shelving but does not know where to start. I ask them: what is the natural focal point of your kitchen? For most people, it is the range or the window above the sink. Those two elements are your anchors. Build your shelving outward from there symmetrically and you almost cannot go wrong.
What you place on symmetrical shelves matters just as much as the placement itself. Keep the items on each side loosely mirrored not identical, but balanced in visual weight. Two matching stacks of plates on either side. Similar-height objects on each end. A plant on the left balanced by a tall canister on the right. Your eye reads balance even when the items are not identical, and that is where the magic lives.
A quick trick I always share with clients who are nervous about styling: take a photo of your shelves and look at it in black and white. Color disappears and you can see pure visual weight. If one side looks heavier than the other in that photo, it needs adjusting. That simple technique has saved more shelf styling sessions than I can count.
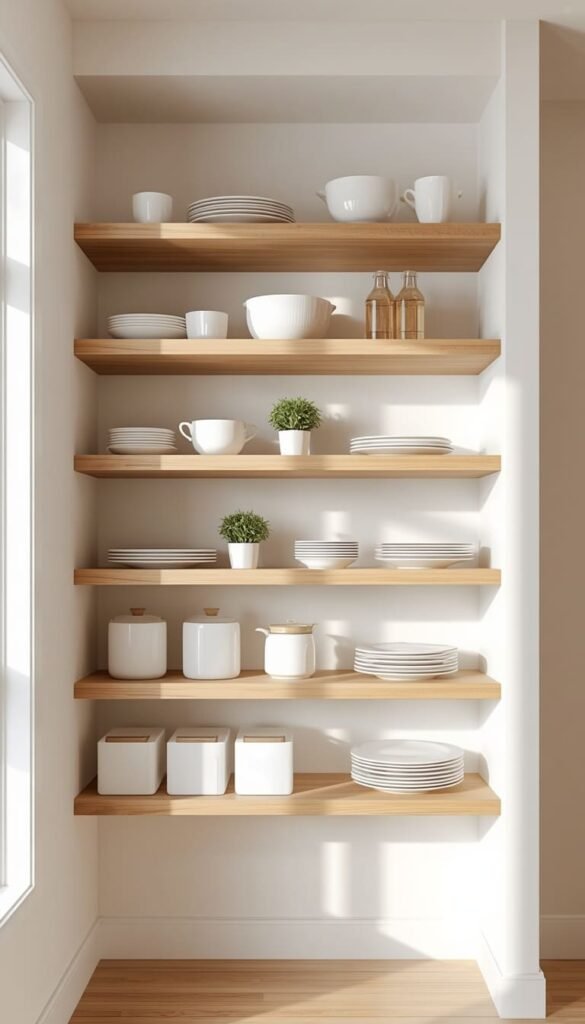
8. Minimalist Shelves With Neutral Styling for a Clean Calming Kitchen
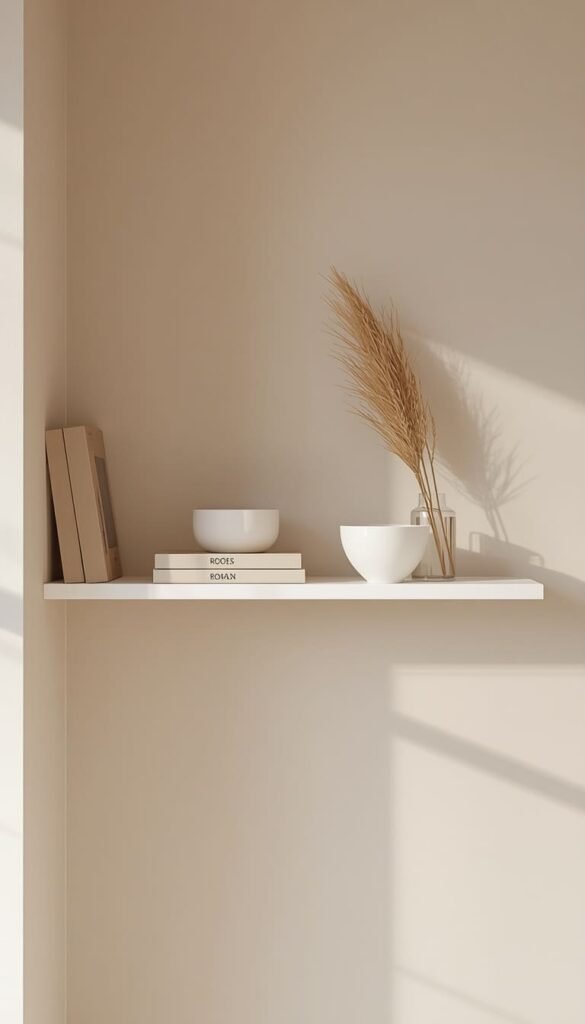
Not everyone wants their kitchen shelves to be a showstopper. Some of my favorite projects have been the quiet ones kitchens where the shelving blends into a serene, neutral backdrop and the whole space just feels like a deep breath. That is the minimalist shelf approach, and it is harder to pull off than it looks.
The foundation of minimalist open shelving is restraint. You are not displaying everything you own. You are displaying a carefully edited selection of items that are either genuinely beautiful, genuinely useful, or both. Every single item on a minimalist shelf should earn its place. If it is not earning it, it does not belong there.
For neutral styling that actually works, stick to a palette of three tones maximum typically white, cream, and one natural material like wood, linen, or stone. Matte finishes read as more sophisticated than glossy ones in a minimalist context. And negative space is not emptiness it is part of the design. Leave room between objects. Let the shelf breathe.
The practical upside of this approach that nobody talks about enough: minimalist shelves are the easiest to keep clean. Fewer items means faster dusting, quicker wipe-downs, and a kitchen that looks pulled together even on your busiest weekday mornings. For anyone who loves the idea of open shelving but worries about maintenance, this is the version I always recommend starting with.
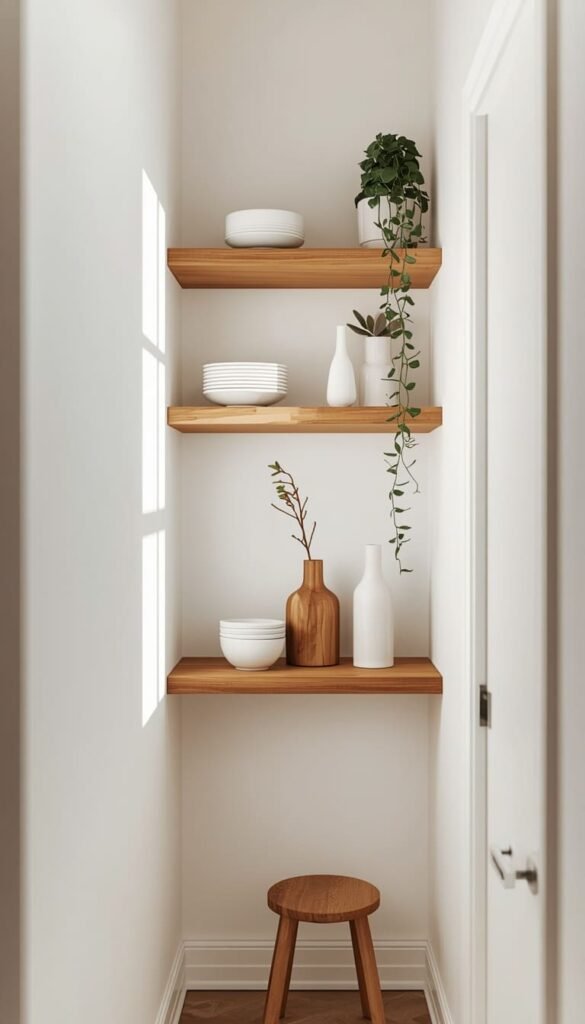
9. Corner Shelves That Turn Wasted Space Into Smart Storage
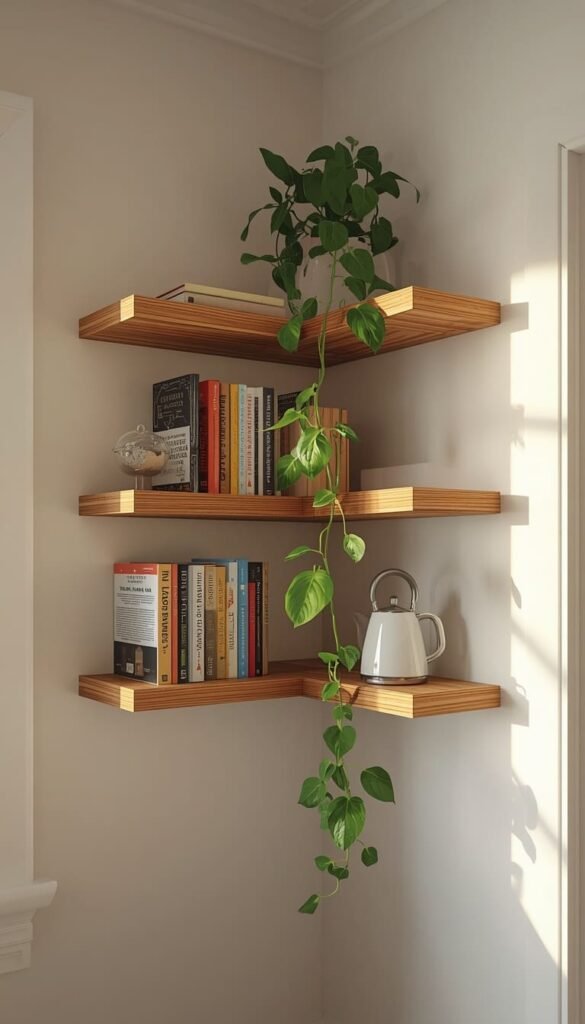
Kitchen corners are some of the most underutilized real estate in any home. Most upper cabinet layouts either ignore the corner entirely or fill it with an awkward rotating lazy susan situation that nobody is ever fully satisfied with. Open corner shelves solve this problem elegantly and without the mechanical complexity.
The approach I love most is wrapping shelves continuously around the corner rather than stopping them abruptly at the wall’s edge. When shelves turn the corner and keep going, the storage feels intentional and the kitchen feels larger because your eye follows the shelf line around the room rather than hitting a dead end.
Corner shelves work especially well for items you want accessible but do not need every single day. Think about placing these there:
- Small appliances like a toaster or electric kettle that clutter the counter but need to stay within reach
- A collection of cookbooks arranged by spine color for a beautiful and functional display
- Baskets or bins holding dry goods that look organized from a distance
One honest caveat corner shelves do require a bit more precision during installation. The bracket placement needs to account for the angle of the wall junction, and if your walls are not perfectly square (and in older American homes, they rarely are), you will need to scribe the shelf edge to fit cleanly. A good carpenter handles this in under an hour. A rushed DIY job will leave a gap that bothers you every single day.
10. Wallpaper Backed Shelves That Turn Everyday Storage Into Wall Art
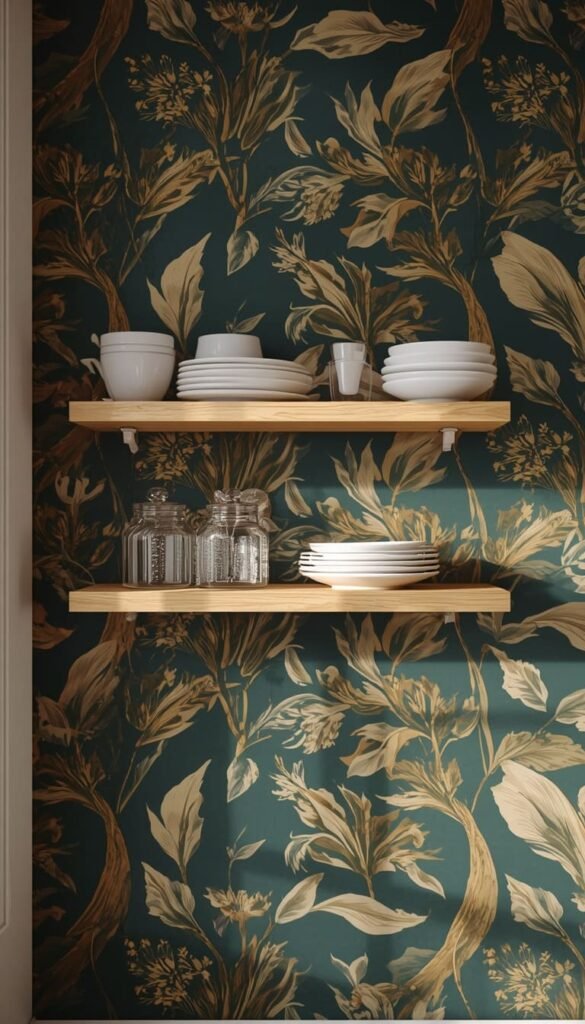
This is one of those ideas that consistently stops people mid-scroll on Pinterest, and I completely understand why. The concept is simple: install open shelves against a wall covered in bold, beautiful wallpaper, and suddenly your kitchen storage becomes a piece of art. The contrast between the graphic pattern behind and the practical items in front creates a layered, curated look that feels deeply personal.
I used this approach in a breakfast nook kitchen in Denver, Colorado a narrow galley with almost no natural light and walls that felt relentlessly beige. We added a deep botanical print wallpaper to the back wall and mounted two natural oak shelves in front of it. The transformation was dramatic. That dark, flat wall became the most talked-about feature of the entire home.
The key to making this work without it feeling chaotic is keeping the items on the shelves simple and relatively uniform. When the wallpaper is doing the heavy lifting visually, your shelves need to calm down. White or cream dishware, clear glass canisters, simple ceramic pieces these sit in front of a bold pattern without competing with it. The moment you add too many colors or mismatched items on top of a busy wallpaper, the whole thing tips into overwhelming territory.
If wallpaper feels like too permanent a commitment, peel-and-stick options have genuinely improved in quality over the last few years. Several of my clients have used Chasing Paper or Rifle Paper Co. removable wallpaper behind their shelves with results that are nearly indistinguishable from the real thing and fully renter-friendly.
11. The Remove One Cabinet Door Trick for a Budget Friendly Refresh
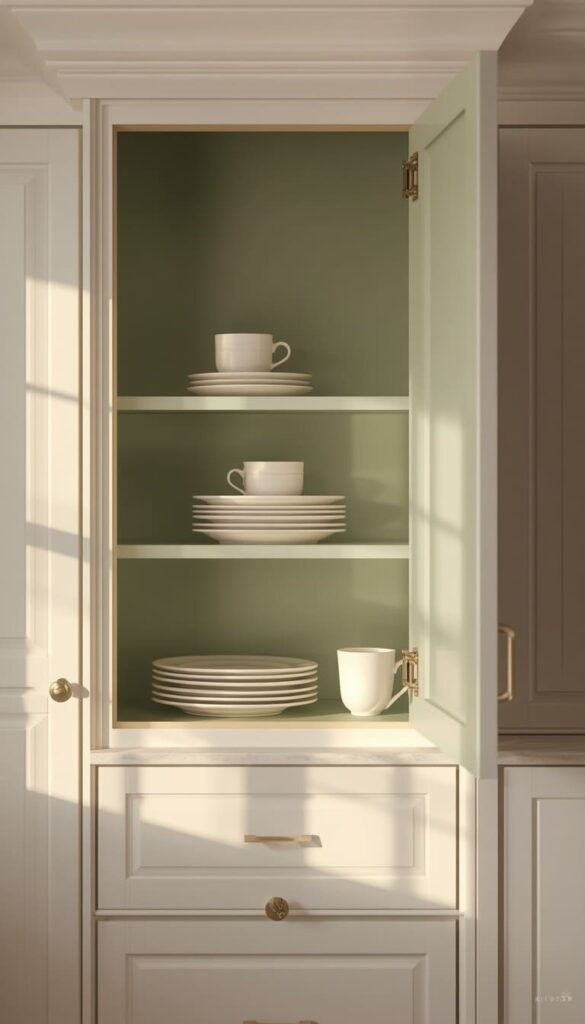
If you are not ready to commit to a full open shelving installation and honestly, not everyone should this is the approach I recommend as a starting point. Simply remove the doors from one or two of your existing upper cabinets and style the interior as you would an open shelf. That is it. No tools beyond a screwdriver. No new materials. No contractor.
The transformation this creates is surprisingly significant. Breaking up a solid wall of cabinet doors with one or two open sections adds visual interest, lightens the overall look of the kitchen, and gives you a low-stakes way to test whether open shelving actually works for your lifestyle before committing further.
To make the open cabinet interior look intentional rather than unfinished, paint the inside back wall in a contrasting color or add a piece of peel-and-stick wallpaper to the back panel. That small detail signals that the opening was a design choice, not an accident or an unfinished renovation. I have seen this done in kitchens across every budget level and it reads beautifully every single time.
The honest reality here is that this trick works best when you are already a relatively organized person. An open cabinet with randomly stacked mismatched items looks messier than a closed cabinet door ever would. If organization does not come naturally to you, invest in a set of matching dishes or uniform canisters before you remove those doors. The consistency of what is displayed matters more than almost anything else.
Are you ready to ditch your upper cabinets, or is there one thing still holding you back?
12. DIY Open Shelves You Can Install in a Weekend Renter Friendly Too
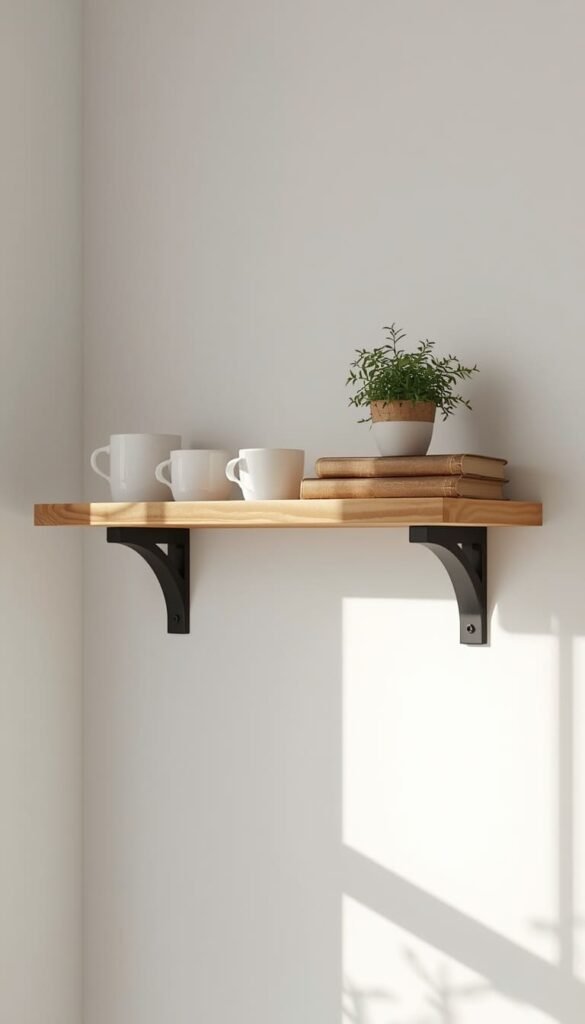
The final idea on this list is also the most accessible and the one I get asked about most often. DIY open kitchen shelves have genuinely never been easier to execute than they are right now. Between the quality of bracket hardware available at stores like Home Depot and IKEA, the range of pre-finished wood options, and the wealth of installation tutorials available, a confident beginner can have two to three shelves mounted and styled in a single weekend.
For a truly renter-friendly version, look into floating shelf systems that use a French cleat mounted into studs rather than individual bracket penetrations. The cleat distributes weight across a longer span of wall, requires fewer anchor points, and critically leaves smaller, easier-to-patch holes when you eventually move out. Pair this with a pre-finished oak or pine board from any home improvement store and you have a custom-looking shelf for under $60 per unit.
A few things I always tell first-time DIY shelf installers before they start:
- Find your studs before you do anything else — a $15 stud finder is non-negotiable and will save you from a shelf that pulls out of the wall under weight
- Level is everything — even a shelf that is off by half a degree will look crooked once items are placed on it and will bother you indefinitely
- Sand and seal your wood before mounting, not after — it is infinitely easier to finish a board on sawhorses than to work around brackets and a wall
The renter-friendly reality is that open shelves leave smaller traces than almost any other kitchen upgrade. A few spackled holes and a coat of paint and the wall is back to its original state. For anyone living in a rental who wants a kitchen that actually feels like home, this is where I would start every single time.
Your 60-Second Shelf Decision Map
By Budget
Weekend Budget ($40 – $250)
- Go DIY with pre-finished pine boards and French cleat brackets
- Remove one cabinet door and style the interior — zero material cost
- Reclaimed wood from a salvage yard keeps costs under $100 for two shelves
- IKEA LACK or EKBY shelves are a solid starting point for first-timers
💎 Investment Budget ($500 – $2,500)
- Built-in shelves that run floor to ceiling for a fully custom look
- Glass shelves with unlacquered brass brackets for a modern glam kitchen
- Hire a carpenter for thick floating walnut shelves anchored properly into studs
- Wallpaper-backed shelving with high-end peel-and-stick or traditional paste wallpaper
By Lifestyle
Busy Families and High-Traffic Kitchens
- Stick to lower shelves only — keep upper storage closed to reduce daily visual chaos
- Choose matte or oiled wood finishes that hide fingerprints and minor grease splatter
- Avoid glass shelves entirely — the maintenance will frustrate you within a week
- Build a dedicated coffee bar shelf so mornings run on autopilot
Minimalists and Calm-Space Seekers
- One level of shelving only — restraint is the whole point
- Neutral dishware in white or cream, nothing else on display
- Corner shelves for items you need but do not want front and center
- Match shelf color to wall color for an understated, barely-there look
For Small Kitchens Specifically
- Narrow shelves at 10 to 12 inches deep keep the space from feeling crowded
- Always place something tall on the top shelf to draw the eye upward
- Wrap shelves around a corner to maximize every inch without adding visual bulk
Frequently Asked Questions
Are kitchen shelves instead of cabinets a good idea for everyday use?
Yes, but only if you are a reasonably organized person. Open shelves reward tidiness and punish clutter everything you own is permanently on display, so what you put there matters.
How much does it cost to replace kitchen cabinets with open shelves?
The average cost runs between $150 and $500 for a basic floating shelf setup. Built-in or custom shelving can reach $2,500 depending on materials and labor.
Do open kitchen shelves get dusty and greasy quickly?
Yes. Shelves near the stove collect grease faster than you expect. A quick wipe-down once a week keeps them looking clean without turning maintenance into a second job.
What should I not put on open kitchen shelves?
Avoid storing rarely used appliances, mismatched containers, or anything you would normally hide behind a cabinet door. If you would not want a guest to see it, it does not belong on an open shelf.
Can renters install open shelves without damaging walls?
Absolutely. A French cleat system anchored into studs leaves minimal holes that patch easily with spackle before move-out. Freestanding shelf units are another zero-damage option worth considering.
Conclusion
Your kitchen does not need a full renovation to feel like a completely different space. Sometimes all it takes is pulling three cabinet doors off, mounting a couple of walnut shelves, and styling them with the dishes you already own. That single afternoon of work can change how you feel about your kitchen every single morning for years. Start small pick one wall, one section, one shelf and let that first step show you what is possible.
So tell me are you team open shelving, or does the idea of everything being on display still make you a little nervous? Drop your answer in the comments, I read every single one.