Your kitchen cabinets are the first thing every guest notices and the last thing most homeowners think to update until the whole space starts feeling tired and dated. The good news? You do not need a full renovation budget or a contractor on speed dial to fix that. Painting your kitchen cabinets is hands down one of the highest-impact, lowest-cost upgrades you can make to your home. I have seen a fresh coat of the right paint completely change how a kitchen feels brighter, newer, and honestly more expensive-looking than it actually was. Done correctly, this one project can save you anywhere from $10,000 to $30,000 compared to a full cabinet replacement.
My Design Notes
A few years back, I worked with a homeowner in Nashville, Tennessee who had already attempted this project on her own before calling me in. She had used standard wall paint on her MDF cabinets, skipped the bonding primer entirely, and reinstalled the doors after less than 18 hours of drying. Within three weeks, the paint was peeling at every hinge point and the drawer fronts were literally sticking shut. We stripped everything back to bare surface, started completely fresh with the correct bonding primer, switched to Benjamin Moore Advance, and this time gave the entire project a full 72 hour cure before a single door went back on. The transformation was stunning a deep Hale Navy finish that looked like it came straight out of a designer showroom. She still sends me photos of that kitchen. That project is exactly why I now walk every single client and reader through the full process before they pick up a brush.
Mastering Kitchen Cabinet Painting — Proven Techniques for a Stunning Professional Finish at Home
1. Why Painting Your Kitchen Cabinets Is the Smartest Budget Remodel Move You Can Make
Let me put some real numbers on the table. A full kitchen cabinet replacement in the US runs anywhere from $15,000 to $50,000 depending on your market, material, and layout. A professional cabinet painting job? Typically $3,000 to $8,000. A well-executed DIY paint project with quality materials? You can pull it off for $200 to $600. That gap is enormous and for most homeowners, the painted result is virtually indistinguishable from brand new cabinetry when the prep and paint are done right.
What makes this upgrade especially smart is the return on investment. Kitchen updates consistently rank among the top ROI home improvements when it comes to resale value. I have worked with clients who listed their homes after a cabinet painting project and watched buyers compliment the “new kitchen” cabinets that were original to a 1990s build. Fresh paint, updated hardware, and a cohesive color palette did all the heavy lifting.
The emotional payoff is real too. You spend more time in your kitchen than almost any other room. Walking into a space that feels clean, intentional, and visually updated every single morning changes how you feel about your home.
2. Be Honest With Yourself First — When Painting Is Worth It and When It Is Not

This is the conversation I wish more guides would have upfront. Not every cabinet is a good candidate for painting, and finding that out three days into a project is a painful lesson.
Here is what to assess before you buy a single can of primer:
- Cabinet structure: If the doors are warped, the frames are soft or water damaged, or the box joints are separating, paint will not fix any of that. It will actually highlight the damage once the sheen hits it.
- Material type: Solid wood and plywood cabinets are your best friends here. MDF can work beautifully with the right bonding primer. Thermofoil, however, is a different story — the heat and moisture in a kitchen cause thermofoil to peel away from the substrate over time, and paint rarely adheres well long term.
- Existing finish condition: Heavy grease buildup that has soaked into the wood over decades is extremely difficult to fully remove. If your cabinets smell like old cooking oil no matter how much you clean them, that is a red flag.
If your cabinets are structurally solid, relatively clean, and made from wood or MDF, you are in excellent shape. Green light. If two or more of those boxes are not checked, I would honestly have a conversation about replacement before you invest your weekend and your budget into a project that may not hold.
3. Everything You Need to Gather Before You Touch a Single Cabinet Door
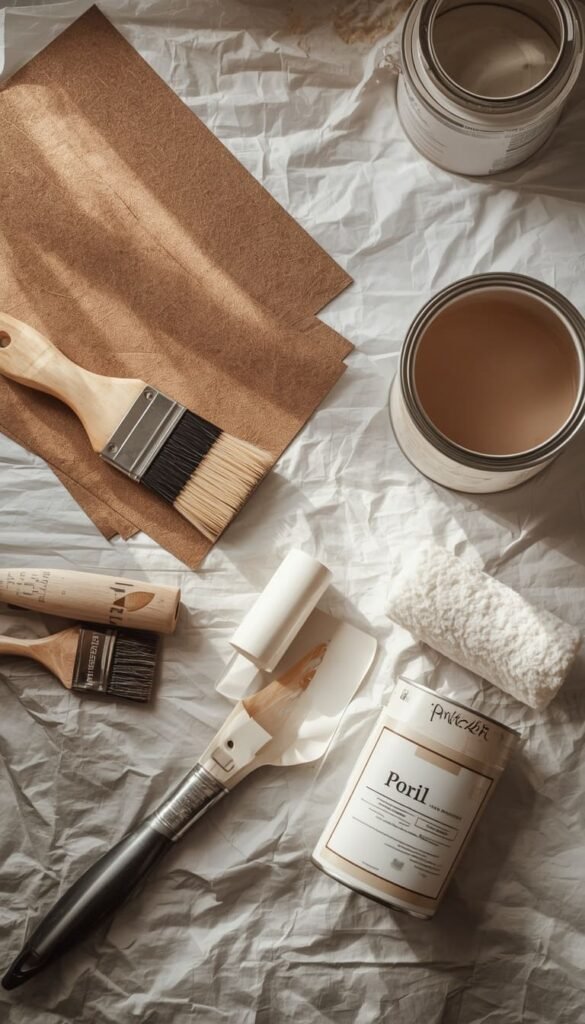
One of the biggest mistakes I see with DIY cabinet projects is starting without the right supplies and then making multiple hardware store runs mid-project. That kills momentum and adds stress. Pull everything together before day one, and the whole process flows so much more smoothly.
For a solid DIY setup, here is what you actually need:
- TSP degreaser or a heavy duty kitchen degreaser
- Wood filler and a putty knife
- 120 grit sandpaper and 220 grit sandpaper (or a sanding block)
- A quality bonding or shellac primer
- Cabinet specific paint — Benjamin Moore Advance or Sherwin Williams Emerald Urethane are my top two recommendations
- A high density foam roller for flat surfaces
- An angled sash brush for detail work and edges
- Painter’s tape and drop cloths
- A tack cloth for dust removal between sanding steps
Now, on budget. A basic but effective DIY kit will run you around $150 to $200 in materials. If you want to step up to a paint sprayer for that ultra smooth, factory-like finish, budget closer to $300 to $400 when you factor in the sprayer rental or purchase, masking materials, and protective gear. The sprayer route requires more setup and practice but the finish difference is genuinely impressive on raised panel doors.
A quick trick I have learned over the years buy slightly more paint than you think you need. You will almost always need a touch-up coat somewhere, and trying to color-match a half-used can six months later is a headache you do not want.
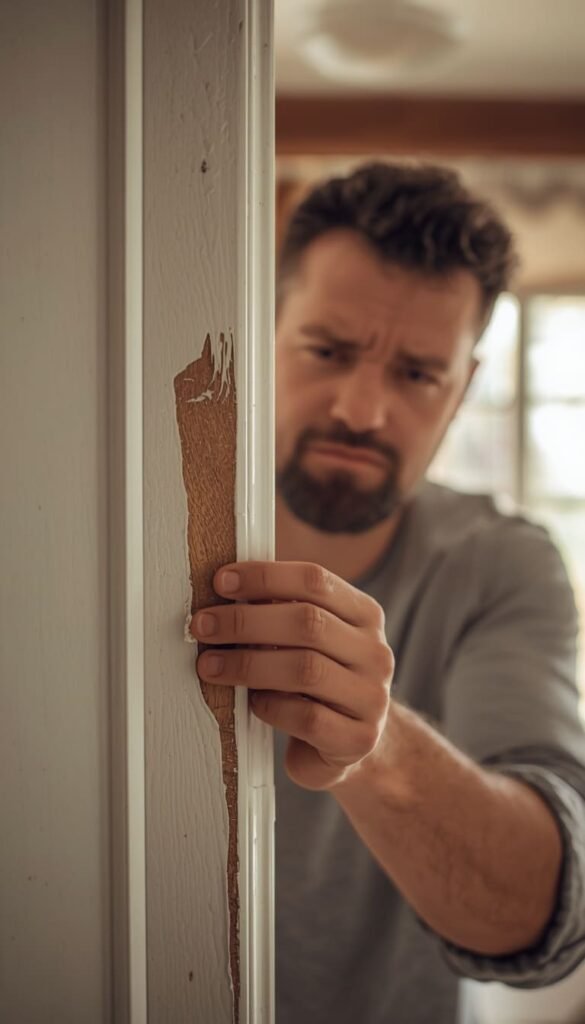
4. The Prep Work That Separates a Pro Finish From a Peeling Disaster
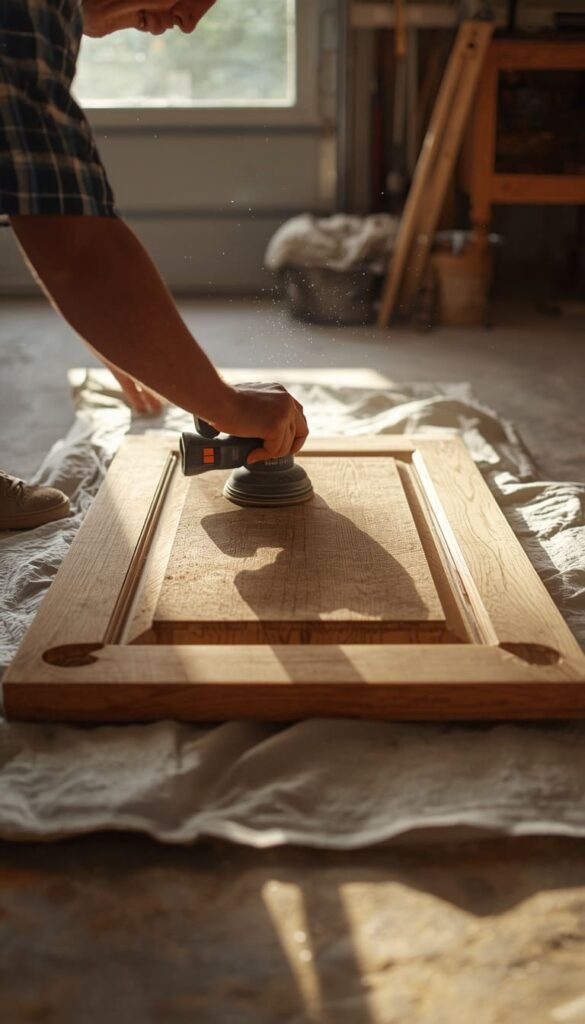
If there is one single thing I could make every DIY-er understand before they start, it is this: the prep phase is the entire project. The painting part is almost secondary. Cabinets that peel, bubble, or look uneven within a year were almost always under-prepped, not under-painted.
Start by removing every door, every drawer front, and every piece of hardware. Label each door with a piece of painter’s tape and a number that matches its cabinet opening this sounds overly cautious until you are standing in your kitchen at 9pm trying to figure out which door belongs where. Trust me on this one.
Clean every surface with TSP degreaser. Not a general all-purpose spray actual TSP or a heavy kitchen degreaser. Kitchen cabinets accumulate years of cooking grease, and paint simply will not bond properly to a greasy surface no matter how good your primer is. Wipe everything down, let it dry completely, and then do it again on anything near the stove.
Once clean and dry, sand with 120 grit to scuff the existing finish and open the surface for primer adhesion. Then fill any nicks, gouges, or holes with wood filler, let it cure fully, and do a final light sand with 220 grit for smoothness. Finish every sanding step by wiping down with a tack cloth. Dust is the enemy of a smooth finish even a tiny amount of sanding dust left on the surface will show up under paint.
Top 6 ideas:
| Idea | Estimated Price | Maintenance |
|---|---|---|
| Basic DIY Cabinet Painting (brush and roller) | $150 to $250 in materials | Medium |
| Semi-Pro DIY with Paint Sprayer | $300 to $450 including sprayer | Medium |
| Professional Cabinet Painting Service | $3,000 to $8,000 full kitchen | Low |
| Cabinet Painting with Hardware Upgrade | $250 to $500 total | Medium |
| MDF Cabinet Refinishing with Bonding Primer | $180 to $300 in materials | Medium |
| Full Cabinet Replacement (for comparison) | $15,000 to $50,000 installed | Low |
5. Primer Is Not Optional — Here Is How to Choose and Apply It Correctly
I cannot tell you how many times I have heard “I skipped the primer and just did three coats of paint instead.” That is not how this works. Primer and paint are doing completely different jobs. Paint adds color and finish. Primer creates the bond between the surface and everything that goes on top of it. Skip it and you are essentially building on sand.
The primer you choose depends entirely on your cabinet material:
- Solid wood or plywood: A shellac-based primer like Zinsser BIN is excellent. It blocks tannin bleed, seals the wood, and gives paint something truly solid to grip.
- MDF cabinets: Go with a bonding primer. MDF is porous and drinks up product fast, so a high-build bonding primer will seal that surface and prevent the wood fiber texture from telegraphing through your topcoat.
- Laminate or previously painted surfaces: Zinsser Bulls Eye 1-2-3 or a dedicated adhesion primer is your best move here.
Apply primer with a foam roller on flat surfaces and a brush on edges and detail areas. One solid coat is usually sufficient if you are working with a good quality product. Let it dry for the full time listed on the label not “close enough.” In a well-ventilated space, most primers need a minimum of one hour, but two hours is better. Once dry, do a light sand with 220 grit, wipe with a tack cloth, and you are ready for paint. That final sand after priming is what gives you that glass-smooth base every gorgeous painted cabinet has.
Which cabinet color are you most drawn to right now a warm white, a deep navy, or something bold and unexpected?
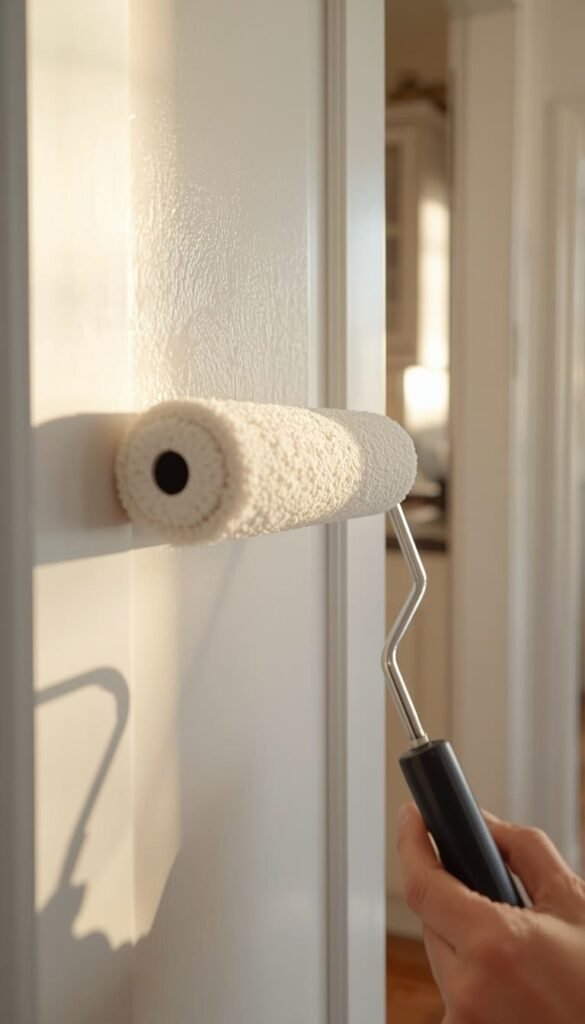
6. Painting Day — Brush Roller or Sprayer — Which One Is Right for Your Skill Level
This is where most people get excited and also where most mistakes happen. The application method you choose will directly affect your final finish quality, so pick based on your actual skill level not what looks coolest on YouTube.
A brush alone works fine for detail-heavy doors with lots of profile and molding. The key is using a high quality angled brush and always painting in the direction of the wood grain. Cheap brushes leave bristle marks. Period.
A foam roller paired with a brush is honestly my go-to recommendation for most DIY homeowners. Use the roller on flat cabinet faces and drawer fronts, and the brush for edges, corners, and any recessed details. This combo gives you a relatively smooth finish without the steep learning curve of a sprayer. One thing to watch out for is roller stipple that slightly bumpy texture foam rollers can leave. Using a high-density foam roller and applying thin, even coats minimizes this significantly.
A paint sprayer delivers the closest result to a factory finish and is genuinely worth it for flat slab-style cabinet doors. The Wagner HVLP or the Graco Project Painter Plus are both solid options at a reasonable price point. That said, sprayers require proper masking of everything around you, consistent technique, and careful thinning of the paint to the right viscosity. Practice on a scrap piece of wood or cardboard before you point it at your actual cabinets.
Apply two thin coats regardless of which method you choose. Thick coats drip, sag, and take forever to cure properly. Thin coats layer beautifully.
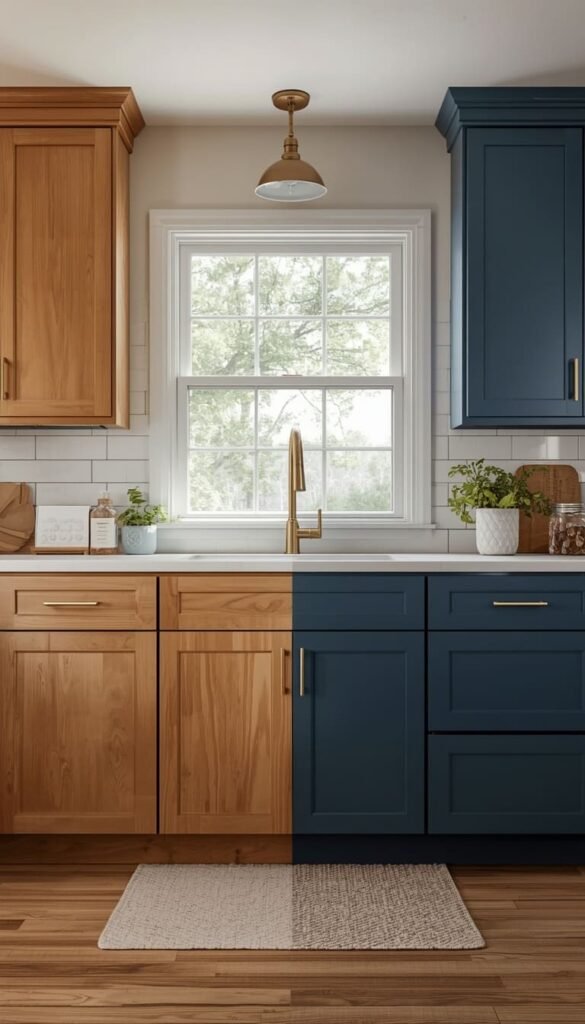
7. How to Choose the Right Cabinet Color That You Will Not Regret in Two Years
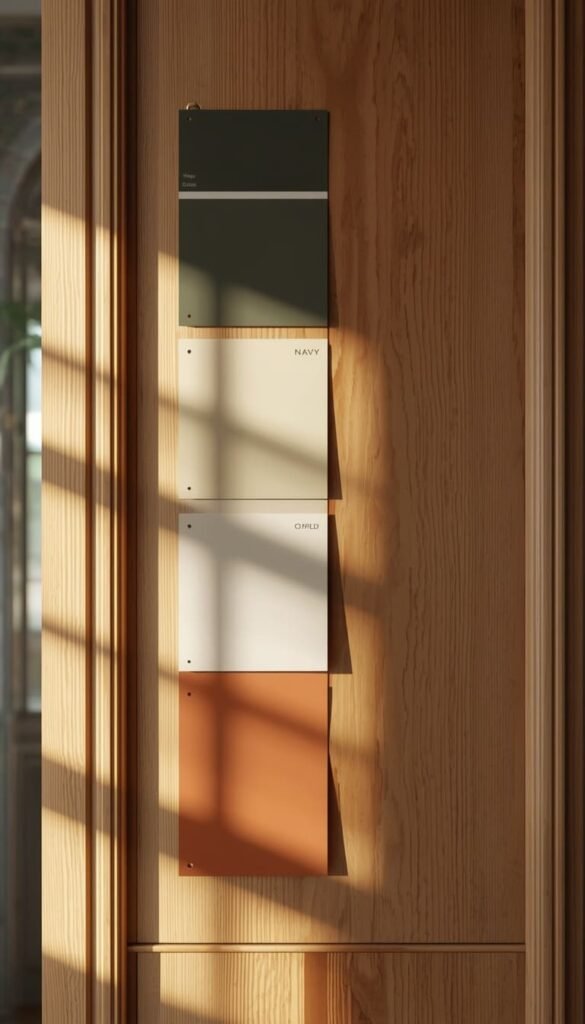
Color is where the fun lives but it is also where I see the most post-project regret. The mistake most people make is choosing a color they love on a tiny paint chip under store lighting, then living with it on 40 square feet of cabinetry in morning light, evening light, and everything in between. Always test your color in the actual space first. Buy a sample, paint a large swatch directly on one cabinet door, and live with it for 48 hours across different times of day.
Right now in 2025, the cabinet colors I am seeing homeowners absolutely love and not tire of fall into a few clear families:
- Deep moody greens like Sherwin Williams Pewter Green or Benjamin Moore Salamander. These work especially well in kitchens with warm wood tones or brass hardware.
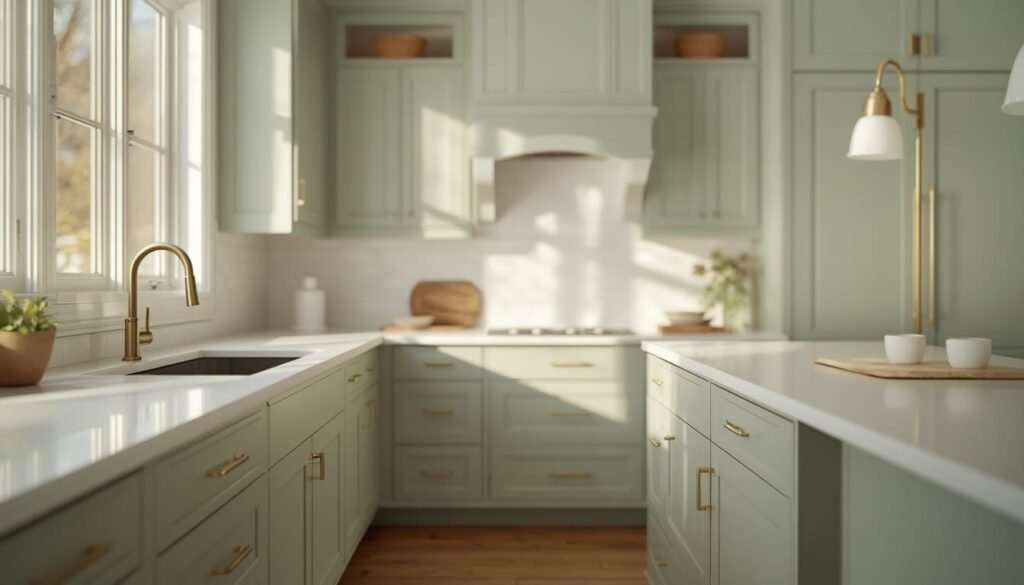
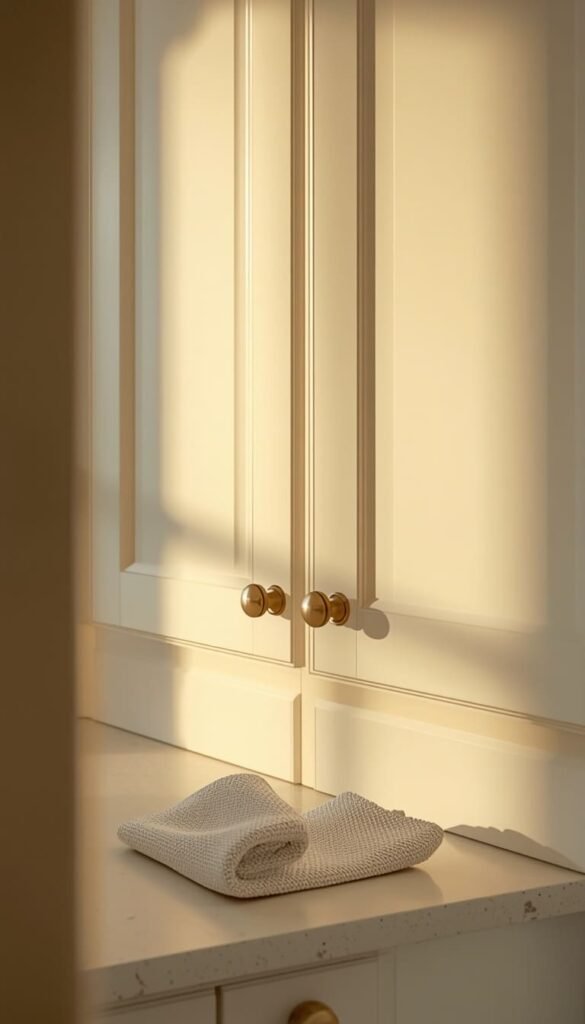
- Warm whites and creamy off-whites like Benjamin Moore White Dove or Sherwin Williams Alabaster. Timeless, endlessly versatile, and they make small kitchens feel significantly larger.
- Sophisticated navies like Benjamin Moore Hale Navy. Classic, polished, and pairs beautifully with gold or unlacquered brass hardware.
- Earthy terracottas and warm taupes are having a real moment in transitional and modern farmhouse kitchens right now.
One styling principle I always share with clients your cabinet color does not exist in isolation. It needs to work with your countertop, your backsplash, your flooring, and your hardware finish. If you have cool-toned gray counters, a warm terracotta cabinet will fight with them constantly. Pull the undertones of your existing fixed elements before landing on a color. That one step alone will save you from a choice you regret.
8. The Post Painting Rules Nobody Tells You — Curing Time Maintenance and Long Term Care
Here is something the paint can label does not explain clearly enough, and it causes so much unnecessary frustration. There is a difference between paint that is dry and paint that is cured. Dry means it is no longer wet to the touch. Cured means the paint has fully hardened to its maximum durability. These are not the same thing, and treating freshly dried cabinets like fully cured ones is one of the most common reasons painted cabinets get damaged in the first weeks after a project.
Most cabinet paints are dry to the touch within two to eight hours. But full cure the point at which the finish is genuinely hard and resistant to chips, stains, and cleaning products takes anywhere from seven to thirty days depending on the paint formula, humidity, and ventilation. Benjamin Moore Advance, for example, reaches full hardness in about seven days. During that window, be gentle. No harsh cleaners, no scrubbing, no stacking things against the cabinet faces.
For long term care, these are the habits that keep painted cabinets looking great for years:
- Clean spills immediately with a soft damp cloth. Do not let anything acidic citrus juice, vinegar, tomato sauce — sit on the surface.
- Use a mild dish soap diluted in water for regular cleaning. Avoid anything with bleach, ammonia, or abrasive particles.
- Add soft close bumpers to cabinet doors if you do not already have them. The repeated impact of doors slamming will wear paint at the edges faster than almost anything else.
Touching up is also much easier than most people expect. Keep a small sealed jar of your leftover paint labeled with the color name and brand stored away from temperature extremes. Small chips and scuffs can be dabbed with a fine artist brush and blend in nearly invisibly if caught early.
Are your kitchen cabinets currently painted, stained, or just crying out for a makeover?
9. Real Mistakes Homeowners Make and How to Avoid Every Single One
Every project teaches you something. After years of working with homeowners across the country on cabinet transformations of every size and budget, I have collected a very specific list of mistakes that show up again and again. Not because people are careless but because nobody warned them ahead of time. Consider this your warning.
The single most common mistake I see is rushing the drying time between coats. I understand the excitement. You want to see the finished result. But applying a second coat over a first coat that has not fully dried causes the paint to wrinkle, lift, and lose adhesion in patches. It looks terrible and it is extremely difficult to fix without starting over. Set a timer. Walk away. Let it dry completely.
The second big one is skipping the label step when removing cabinet doors. It feels unnecessary until reassembly day, when you realize upper cabinet doors and lower cabinet doors are often slightly different sizes and your whole kitchen becomes a frustrating puzzle. Two minutes of labeling saves two hours of misery.
A few more patterns I have noticed that quietly ruin otherwise great projects:
- Using the wrong sheen level for the kitchen environment. Flat and matte finishes look stunning in photos but are genuinely difficult to keep clean in a high-grease, high-moisture space like a kitchen. Satin or semi-gloss is almost always the smarter practical choice.
- Painting the inside of cabinets in a contrasting color without planning it out fully. It can look intentional and beautiful — or it can look like an afterthought. If you go this route, commit to it completely and use the same quality paint and prep process inside as out.
- Not accounting for hardware sizing when updating pulls and knobs. If you are swapping out hardware at the same time as painting — which I highly recommend — measure the existing hole spacing before ordering anything. A gorgeous set of pulls that does not fit your existing drill holes means extra work and extra holes to fill.
The homeowner I think about most when I write guides like this is that Nashville client I mentioned at the start. She did not fail because she was not capable. She failed because she did not have the right information in the right order before she started. That is exactly what this guide was built to fix. With the right prep, the right materials, and a little patience on the curing timeline, painted kitchen cabinets are one of the most rewarding DIY projects a homeowner can take on.
The Cabinet Painting Decision Map
By Budget
Weekend Warrior (Under $300)
- You are comfortable with a brush and roller setup
- Your cabinets are solid wood or plywood in good condition
- You have a full weekend plus two days of curing time available
- You are happy with a satin or semi-gloss finish rather than a sprayed factory look
Serious Upgrade ($300 to $600)
- You want a near-professional sprayed finish on flat slab doors
- You are willing to rent or buy an HVLP sprayer and practice before painting
- You are using premium paint like Benjamin Moore Advance or Sherwin Williams Emerald Urethane
- You are also budgeting for new hardware to complete the full transformation
Call the Pros ($3,000 to $8,000)
- You have intricate raised panel doors that require serious detail work
- Your time is genuinely more valuable than the cost difference
- You want a warranty-backed finish that holds up for years without touch-ups
- You are preparing the home for sale and need a flawless result fast
By Lifestyle
Busy Families with Kids and Pets
- Go semi-gloss — it wipes clean without destroying the finish
- Avoid pure white — choose a warm white or greige that hides daily smudges
- Budget for touch-up paint from day one and keep it stored and labeled
- Soft close bumpers are non-negotiable to protect painted edges
Empty Nesters and Design-Forward Homeowners
- This is your moment for a moody navy or deep forest green
- Matte or satin finish works beautifully when traffic is lower
- Invest in the sprayer setup — the finish difference is worth it at this stage
- Pair with unlacquered brass hardware for a collected, high-end look
Small Kitchen or Rental Refresh
- Stick to light warm whites or soft sage — they visually expand the space
- Focus budget on paint and hardware only — skip the sprayer for a simpler job
- Two coats of a quality paint with proper prep is completely sufficient here
Frequently Asked Questions
How long does it take to paint kitchen cabinets from start to finish?
Realistically, plan for 4 to 5 days total. Two days for prep and priming, one day for painting, and at least two full days of curing before reinstalling doors.
Can you paint kitchen cabinets without sanding?
Technically yes, but I would not recommend it. Without sanding, paint adhesion is weak and peeling starts within months. A light 120 grit scuff takes 30 minutes and saves the entire project.
What is the most durable paint for kitchen cabinets?
Benjamin Moore Advance and Sherwin Williams Emerald Urethane are my top two picks. Both cure to a hard, furniture-grade finish that handles daily kitchen abuse without chipping easily.
Do painted kitchen cabinets hold up over time?
Yes, when prepped and primed correctly they absolutely do. I have seen well-painted cabinets look sharp after seven to ten years with basic care and occasional touch-ups.
Is it cheaper to paint or replace kitchen cabinets?
Painting wins by a landslide. DIY painting runs $150 to $600 in materials versus $15,000 to $50,000 for full cabinet replacement. For most kitchens, painting is the obvious smart move.
Conclusion
Your kitchen deserves better than cabinets you walk past every morning without feeling anything. This project is genuinely one of the most rewarding things you can do for your home and the barrier to starting is lower than you think. Pick up a paint sample this weekend, tape it on your cabinet door, and just live with it for two days. That one small step has turned into some of the most stunning kitchen makeovers I have ever had the privilege of being part of. Your space, your rules, your colors just start.
So tell me are you leaning toward a classic white, a moody green, or something completely unexpected? Drop it in the comments, I would love to help you think it through.