Most mud kitchens look amazing on Pinterest and fall apart by September. I’ve seen it happen more times than I’d like to admit a rushed build, the wrong wood, a poorly chosen spot, and suddenly a $120 project is warping in the rain while the kids have moved on to the trampoline.
Building a mud kitchen that your kids actually use, season after season, comes down to a few smart decisions made before you cut a single board. I’ve helped families across the US set up backyard play spaces that hold up to real weather, real kids, and real budgets.
In this guide, I’m walking you through 10 creative DIY mud kitchen ideas from a 30 minute no tool cinder block setup to a Modern Farmhouse cedar build that’ll make your backyard look like a lifestyle magazine. Let’s get into it.
My Design Notes
Two summers ago, I was helping a family in suburban Nashville completely reimagine their backyard for three kids ages 2, 5, and 8. The mom had an entire Pinterest board dedicated to mud kitchens, all stunning cedar builds with matching herb gardens and hand lettered chalk menus. We had $150, a shaded corner near the fence, and about one weekend to make it happen.
I made three mistakes on that first build. I grabbed pressure treated lumber without checking the chemical rating not ideal for little hands that spend hours touching every surface. I set the counter at a height that felt natural to me, not to a five-year-old’s elbows. And I completely skipped sealing the wood before a stretch of Tennessee summer rainstorms rolled through. By late August, one corner was already showing moisture damage.
Year two, we rebuilt it the right way. Untreated cedar, exterior polyurethane on every single surface, and I dropped the counter height by two full inches. That mud kitchen is still standing today. Those three kids still argue over who gets the chef’s station by the sink, and honestly, that’s the whole point.
Stunning DIY Mud Kitchen Ideas Every American Backyard Deserves
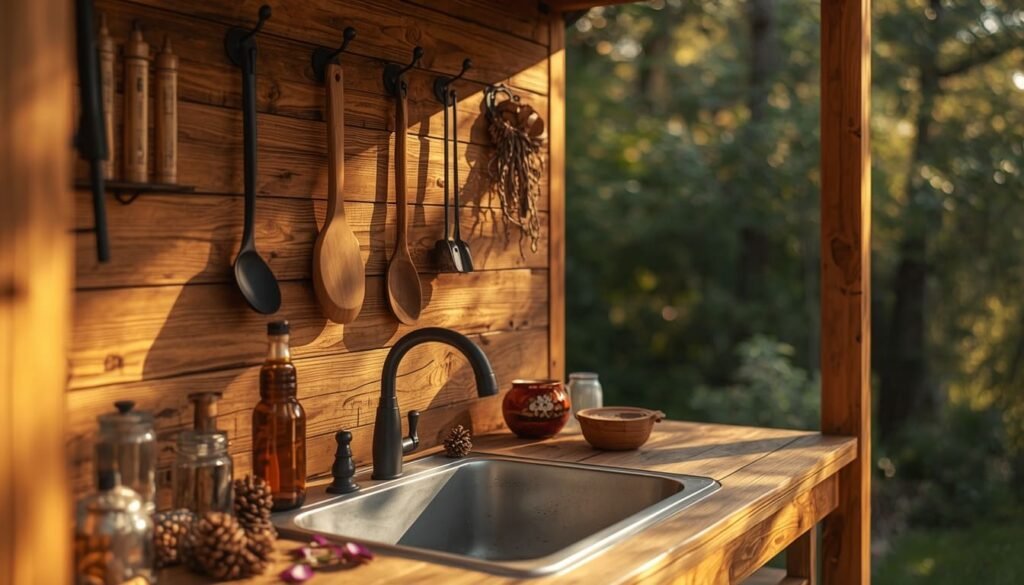
1. The Classic Cedar Build
If you want one mud kitchen that does everything right, cedar is where you start. It’s naturally rot resistant, splinter friendly once sanded, and it ages into that warm honey brown tone that looks genuinely beautiful in a backyard setting. I’ve recommended this build to more families than I can count, and it consistently holds up through harsh Midwest winters and humid Southern summers alike.
The basic frame uses cedar 2x4s for the legs and structure, with cedar fence boards across the top and backsplash. A Rubbermaid tub dropped into a cutout makes a surprisingly functional sink. Budget realistically for this one you’re looking at $80 to $110 in materials depending on your local lumber prices, plus whatever you spend stocking it with thrifted pots and pans.
A quick trick I’ve learned is to add exterior polyurethane specifically to the countertop surface, not just exterior stain. Stain protects the wood. Poly protects against the daily mud and water abuse that a countertop takes. Do both and this build will genuinely last four to five years with minimal upkeep.
- Sand the fence boards to 120 grit before sealing rough sawn cedar will give little hands splinters fast
- Set counter height at your child’s elbow level, not your comfort level
- Draw stovetop burners with a Sharpie and seal over them with poly so they don’t fade
2. The Pallet Mud Kitchen
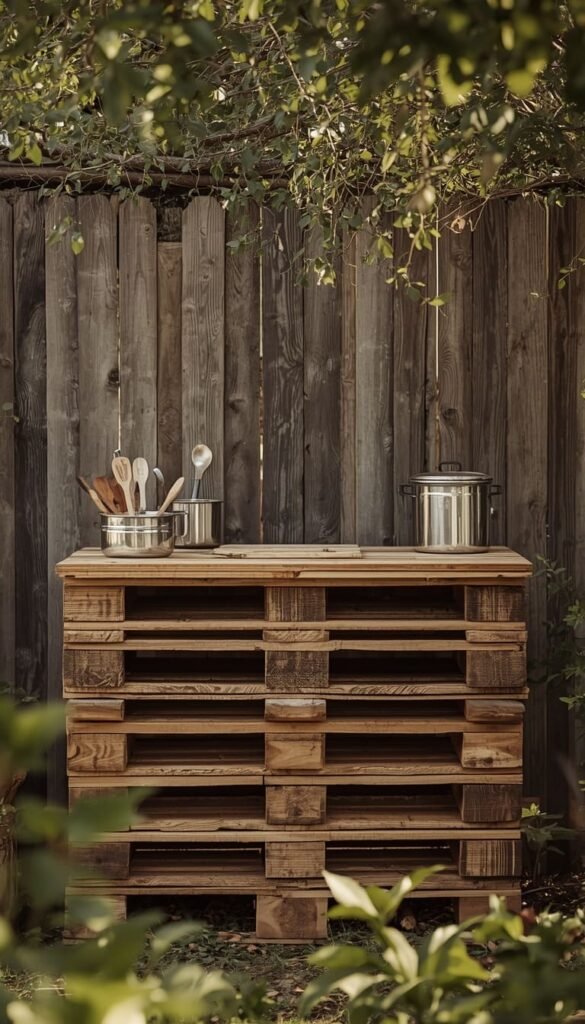
Pallet builds are everywhere on Pinterest, and I understand the appeal completely. The price is hard to argue with pallets are often free from garden centers, furniture stores, and hardware retailers. Stack two vertically, add a board across the front as a countertop, and you have a recognizable mud kitchen shape in under an hour.
Here’s the honest part nobody tells you though. Not all pallets are safe for kids. Always look for the IPPC stamp on the wood. Pallets marked HT (heat treated) are safe. Pallets marked MB (methyl bromide) have been chemically treated and should never be used in a children’s play space, full stop. It’s a small detail that makes a very big difference.
One thing to watch out for is structural stability. Pallets are designed for stacking heavy freight, not for a five-year-old leaning their full body weight against the front edge while stirring a pot of mud soup. Secure them to a fence or wall, or add a simple 2×4 brace across the back legs before letting kids loose on it.
3. The Cinder Block and Board Setup
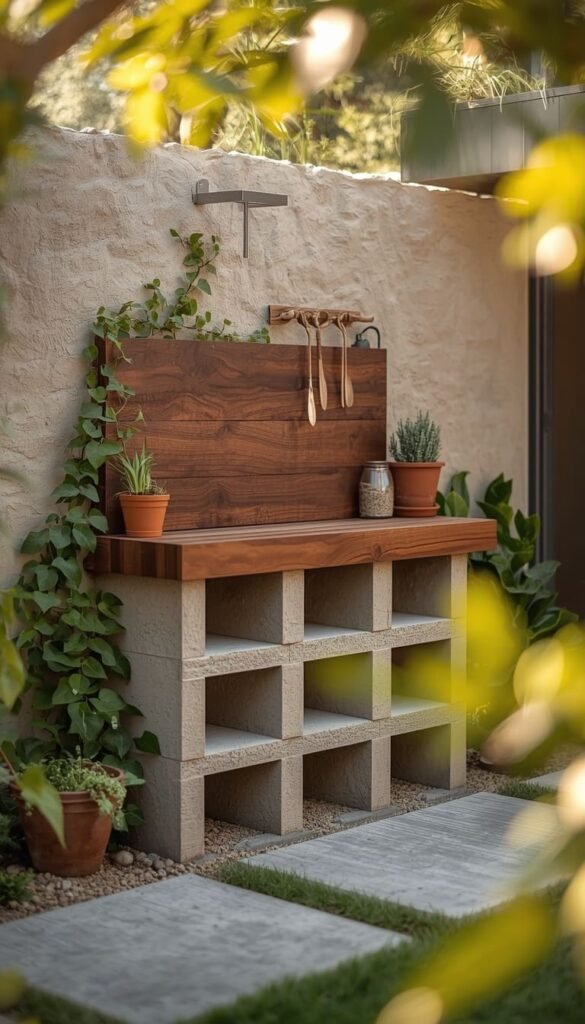
This is the build I recommend to every parent who messages me saying they have zero woodworking experience and zero patience for a weekend project. Two stacks of cinder blocks, one wide cedar or pine board laid across the top, and you have a fully functional mud kitchen counter in about thirty minutes. No drill. No saw. No YouTube tutorial required.
The beauty of this setup is how adaptable it is. Raise the height by adding a block. Widen the surface by using a longer board. Add a second lower level for storage by stacking a shorter set beside it. I’ve seen genuinely charming versions of this in backyards across the country, especially when the board is stained a rich walnut tone and the blocks are tucked behind trailing vines or a few potted herbs.
Seal the board well this is the one place people consistently skip the step and regret it. An unsealed pine board sitting on cinder blocks in the open air will start showing weather damage within a single season.
4. The IKEA Hack Mud Kitchen
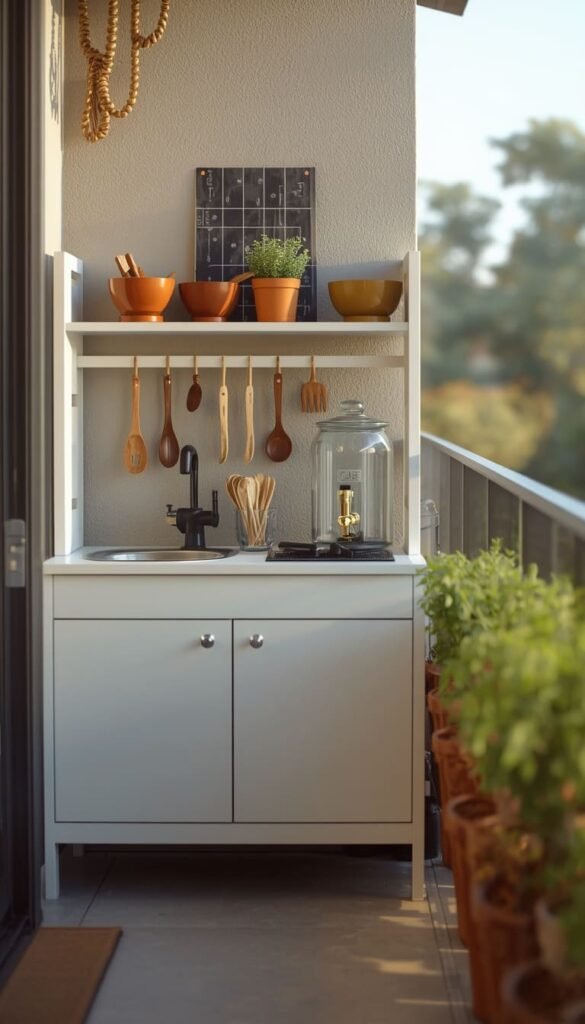
This one is specifically for renters, apartment dwellers, and anyone working with a balcony instead of a backyard. Two IKEA TROFAST shallow bins mounted on the TROFAST frame give you built in storage at the bottom and a usable surface at the top. Add a small beverage dispenser with a spigot on one end for controlled water access, and you have a mud kitchen that costs under $60 and requires zero permanent modifications to your outdoor space.
I love recommending this setup for families in cities like Chicago, Seattle, or New York where outdoor square footage is genuinely precious. The TROFAST frame is also height adjustable, which means you can raise it as your child grows instead of rebuilding from scratch. It’s not the most rugged option on this list, but for balcony play it is absolutely the smartest one.
5. The Upcycled Dresser Mud Kitchen
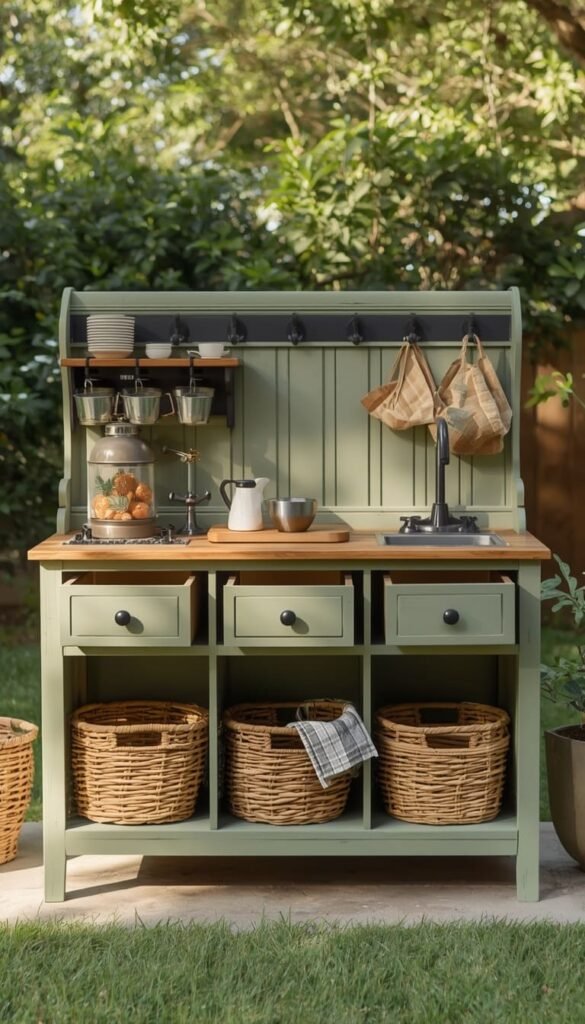
Thrift stores across the US are full of old dressers that nobody wants anymore, and I want you to see them differently the next time you walk past one. An old three drawer dresser solid wood, not particleboard makes one of the most charming and functional mud kitchen bases you’ll ever build. Remove the drawers, flip them into open cubbies for storage, and you instantly have a counter surface, shelving, and character that no flat pack build can replicate.
Sand it thoroughly, seal every surface with exterior paint or a weatherproof primer, and finish with a couple of coats of outdoor polyurethane. The wood grain beneath gives it a warmth that feels genuinely intentional rather than thrown together.
One thing to watch out for here is the wood type. Solid pine and oak dressers handle outdoor life reasonably well once sealed properly. Particleboard and MDF will swell, warp, and fall apart within one rainy season regardless of how well you seal them. Always knock on the side panels before you buy — solid wood sounds dense, MDF sounds hollow.
- Look for dressers with dovetail joints at garage sales; they’re built to last
- Coat the inside of every cubby, not just the exterior facing surfaces
- Add a strip of outdoor rated cup hooks across the back panel for hanging ladles and spoons
Which of these 10 mud kitchen builds fits your backyard best are you leaning toward a quick no-tool setup or a full cedar build you can be proud of for years?
6. The Montessori Inspired Natural Play Kitchen
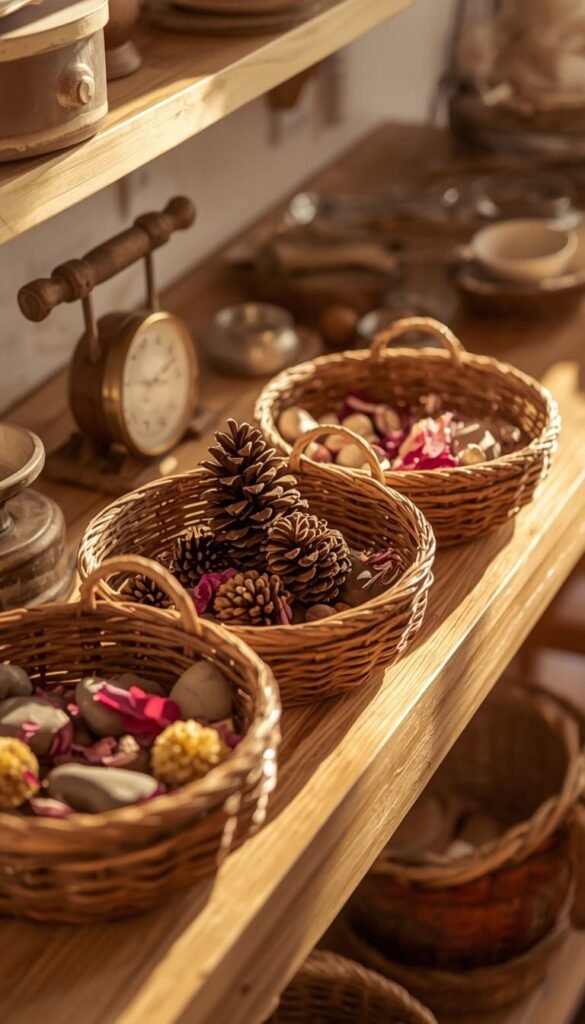
This idea comes up constantly in my conversations with parents who are intentional about the play environments they create. A Montessori aligned mud kitchen looks a little different from the standard build. The counter sits lower genuinely at a toddler’s independent reach height. Every material is natural: wood, metal, ceramic, and woven baskets. There is no bright plastic anywhere in sight.
The focus shifts away from pretend cooking as performance and toward genuine sensory exploration and independence. Loose parts are stored in labeled open baskets at the child’s eye level so they can select, use, and return materials entirely on their own. A small balance scale, a set of measuring cups, and a few glass jars with lids complete the setup beautifully.
I’ve noticed that kids who play at a Montessori style station tend to stay engaged longer and play with more focus. There’s something about the real materials and the uncluttered layout that invites deeper concentration rather than scattered grabbing. Keep the surface clear, rotate the loose parts seasonally, and resist the urge to add more just because you can.
Top 6 Mud Kitchen Ideas at a Glance:
| Idea | Estimated Price | Maintenance |
|---|---|---|
| The Classic Cedar Build | $80 to $110 | Medium |
| The Pallet Mud Kitchen | $0 to $20 | High |
| The Cinder Block and Board Setup | $25 to $45 | Low |
| The IKEA Hack Mud Kitchen | $45 to $60 | Low |
| The Modern Farmhouse Mud Kitchen | $110 to $150 | Medium |
| The Two Story Station | $150 to $250 | Medium |
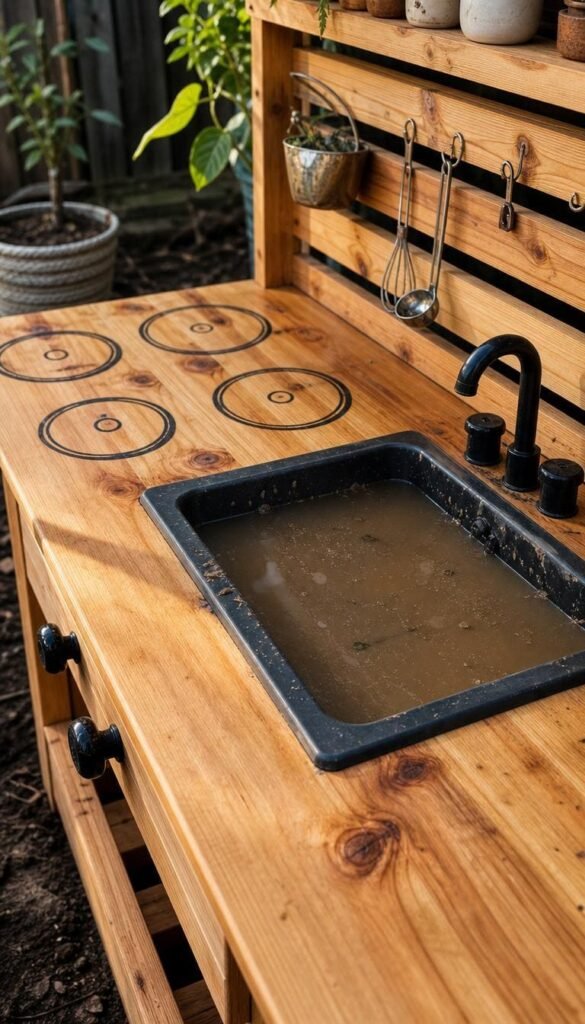
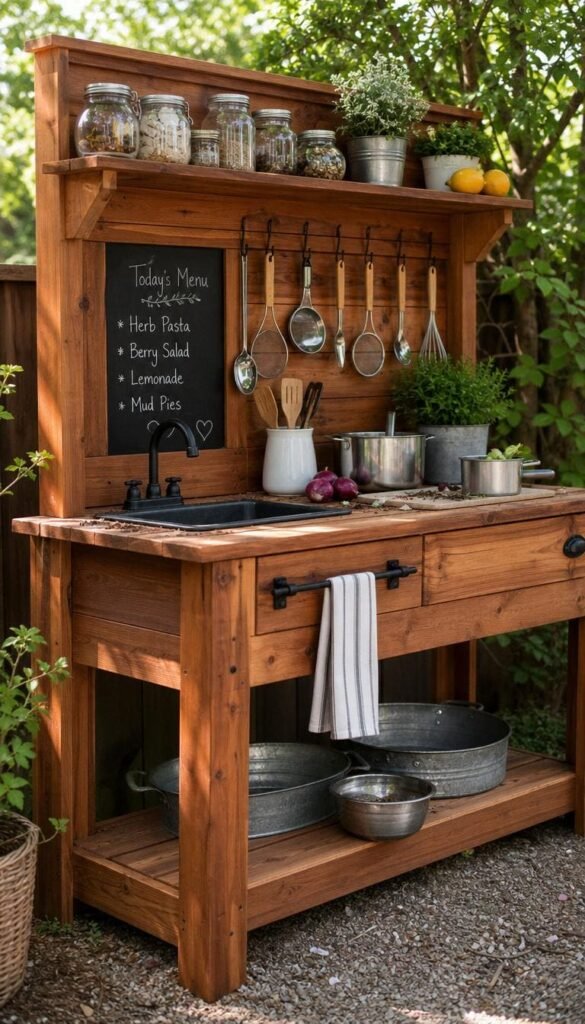
7. The Modern Farmhouse Mud Kitchen
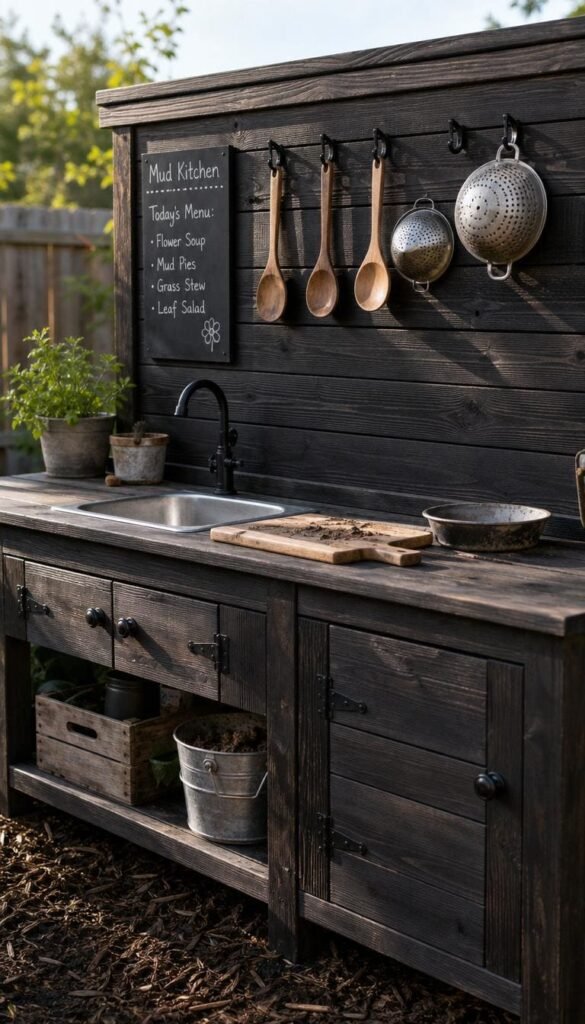
This is the version that stops people in their tracks when they see it in a backyard. Clean lines, a shiplap style cedar backsplash, matte black hardware, and a deep stain in a warm walnut or ebony tone. It looks like it belongs in a Joanna Gaines episode, and the good news is that it’s not as complicated to build as it looks.
The structural bones are identical to the classic cedar build in Idea 1. What changes is purely the finishing. Use narrow cedar fence boards run horizontally across the backsplash instead of vertically that’s your shiplap effect. Swap out any basic hooks for matte black utility hooks from the hardware store. Add a small chalkboard panel to one side of the backsplash for the kids’ daily “menu.”
A quick trick I’ve learned with this particular style is to choose your stain color based on your existing outdoor furniture, not based on what looks good on the lumber yard sample card. The sample card is always photographed in perfect lighting. Your backyard is not a photography studio, and a stain that reads as warm walnut indoors can look almost orange in afternoon sun.
8. The Apartment Balcony Tub Kitchen
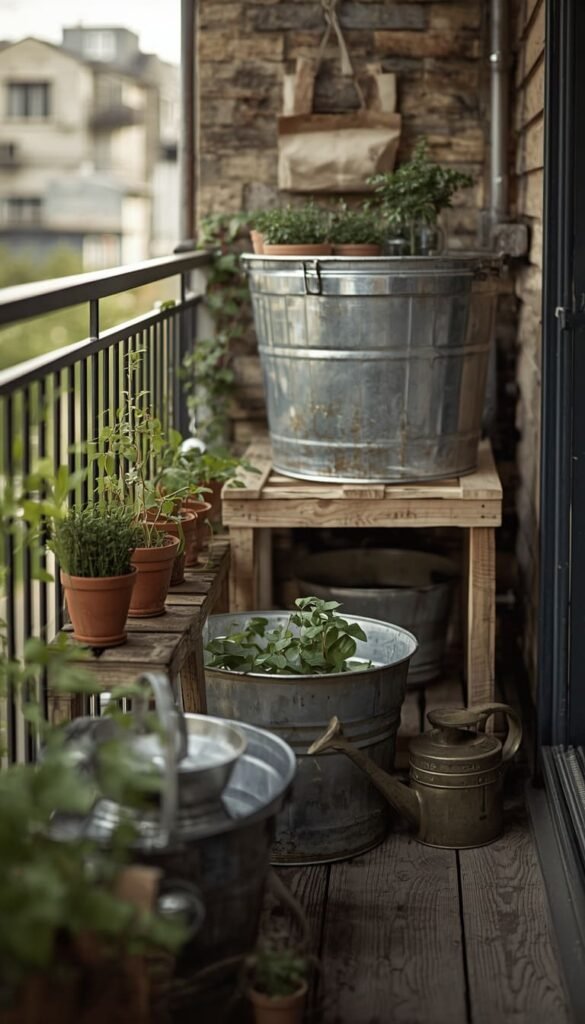
I know I touched on the IKEA hack for small spaces in Idea 4, but this one is different enough to earn its own spot. The tub kitchen requires absolutely nothing built, bought flat pack, or assembled. You need two large galvanized metal tubs or deep plastic basins, a small wooden crate or low stool between them, and a child sized watering can for water access.
Set one tub on a slightly raised surface a sturdy crate works perfectly so there’s a natural height difference that mimics a counter and a lower prep area. Fill the lower tub with clean sand or soil. Keep the upper tub free for water and mud mixing. The galvanized metal aesthetic also happens to look genuinely beautiful on a balcony, especially paired with a few potted herbs nearby.
This setup packs flat for winter storage, costs under $40 in most cases, and leaves zero permanent marks on a rental property. For families in urban apartments, this is honestly the most practical mud play solution on this entire list.
9. The Rustic Stump and Slab Kitchen
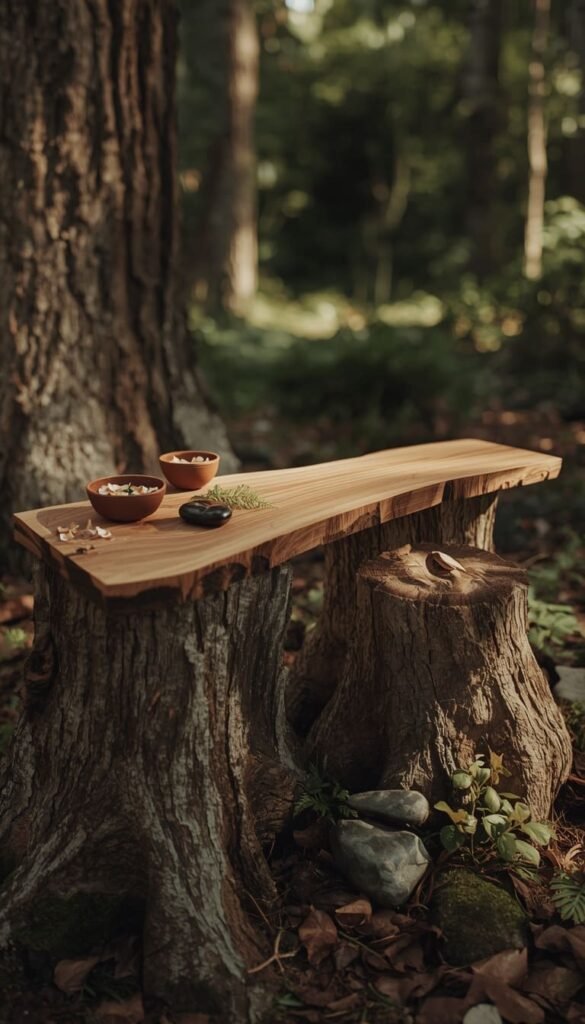
This is the mud kitchen idea that feels least like a project and most like something that simply belongs in your backyard. If you have access to a large cross cut wood slab or a wide tree stump, you already have your countertop. Add two or three smaller stumps as legs or supports underneath, and the whole thing looks like it grew there organically rather than being built on a Saturday afternoon.
I’ve seen this setup work beautifully in Pacific Northwest backyards where Douglas fir stumps are genuinely abundant, and equally well in New England yards with old oak sections left over from storm cleanup. The raw natural material connects kids to outdoor play in a way that painted plywood simply cannot replicate.
The honest reality with this build is that untreated natural wood will eventually decompose that’s just what wood does when it lives outside. Applying a generous coat of raw linseed oil to the slab surface every spring extends the life considerably and keeps the grain looking rich rather than grey and dried out. Don’t expect this one to last a decade, but three to five beautiful seasons is absolutely achievable with minimal care.
- Source slabs from local sawmills, Facebook Marketplace, or storm cleanup services
- Choose a flat-bottomed stump for stability wobbly surfaces frustrate little cooks fast
- Linseed oil rather than polyurethane keeps the natural aesthetic intact
Do you already have a spot in mind for your mud kitchen, or is finding the right corner of your yard still the first challenge to solve?
10. The Two Story Station
This is the mud kitchen for the family that is fully committed to outdoor play as a lifestyle, not just an afterthought. The two story station features a full upper counter at standard child height for active mixing and pouring, a lower shelf at toddler reach for younger siblings, open storage beneath for pots and bins, and a chalkboard menu panel built directly into the backsplash.
It sounds ambitious, but the build logic is straightforward. You’re essentially taking the classic cedar structure from Idea 1 and extending the back legs higher to accommodate a second horizontal shelf above the standard counter level. That upper shelf becomes a display and ingredient station. A strip of matte black pegboard across the back panel keeps utensils organized and accessible without cluttering the counter surface.
What I love most about this design is how it naturally accommodates multiple kids at once without anyone feeling crowded out. The toddler works the lower level independently while the older child runs the upper counter like an actual chef’s station. I’ve watched sibling groups spend two and three hours at this setup without a single argument over space, which is frankly remarkable and worth every extra board you cut.
The 2-Minute Build Decision Map
By Budget
Weekend Builder (Under $50)
- Zero tools? Go cinder block and board
- Have a free pallet? Go pallet build just check for the HT stamp first
- Renting an apartment? Go tub kitchen or IKEA hack
Serious Investor ($80 and Above)
- Want it to last 5+ years? Go classic cedar build
- Want it to look amazing AND last? Go Modern Farmhouse build
- Have kids ranging from toddler to age 8? Go two story station
By Lifestyle
Natural and Intentional Families
- Montessori-inspired natural play kitchen is your match
- Prioritize real materials, open shelving, and low counter height
- Skip plastic entirely metal, wood, and ceramic only
Urban and Small Space Families
- Balcony tub kitchen or IKEA hack are your best friends
- Look for galvanized metal tubs on Amazon or at farm supply stores
- Water control matters more in small spaces use a beverage dispenser, not a hose
DIY Enthusiasts
- Cedar build or two story station will give you the most satisfaction
- Budget an extra $20 to $30 for finishing details like matte black hooks and chalkboard paint
- Seal before you regret it always
Frequently Asked Questions
What is the best wood for a mud kitchen that stays outside year round?
Cedar is your best option. It resists rot naturally without chemical treatment, holds up through freeze thaw cycles, and ages beautifully outdoors.
How much does it cost to build a basic mud kitchen?
The average cost runs $25 to $110 depending on your build style. Cinder block setups cost almost nothing while a cedar build with a sink cutout lands closer to $100.
Is a mud kitchen safe for toddlers under age 2?
Yes, with a few adjustments. Keep water shallow, skip small loose parts that are choking hazards, and choose large grip metal or wooden tools over tiny plastic pieces.
Can I leave a mud kitchen outside during winter?
Most sealed cedar or stained wood builds handle winter fine. Cover it with a breathable tarp, store metal tools indoors, and dump any standing water before the first freeze hits.
What do kids actually make in a mud kitchen?
Mud pies, flower petal potions, leaf soup, rock stew honestly whatever their imagination decides that day. The open-ended nature of it is exactly what keeps kids coming back for hours.
Conclusion
Your backyard doesn’t need to be large, your budget doesn’t need to be impressive, and your woodworking skills don’t need to be perfect. What your kids need is a space that’s theirs — messy, creative, and completely free from screens. Pick one idea from this list that fits your space and your Saturday, grab a few thrifted pots from Goodwill, and just start. The imperfect mud kitchen that actually gets built will always beat the Pinterest-perfect one still sitting in your saved folder.
Now I want to hear from you which of these 10 ideas are you planning to build first, and do you have a small space or a full backyard to work with?